SSH (Secure Shell) as the name suggests is a secure way to connect to other computers and transfer data to/from them. It allows you to authenticate users via SSH keys or using password. If your SSH keys are stolen or password is hacked then anyone with this information can easily access your remote systems. So it is advisable to setup a two factor authentication (2FA) for SSH connections in Linux. In 2FA, the user needs to provide an additional authentication information, in addition to SSH key/password. This is generally a OTP (one time password) received on your mobile phone or an authentication code provided by third-party 2FA apps such as Google Authenticator. Only when the user provides both SSH key/password and this additional information, they will be given access. In this article, we will learn how to setup 2 factor authentication for SSH in Linux.
How to Setup 2 Factor Authentication for SSH in Linux
There are many mobile apps that provide TOTP (Time based one time password). We will use Google Authenticator for our purpose.
1. Install Google Authenticator in Fedora
Open terminal and run the following command to install Google Authenticator in Fedora. Please note, you need to run the following command on the same system that runs your SSH server.
$ sudo dnf install -y google-authenticator
Once Google Authenticator is installed, you can run it with the following command.
$ google-authenticator
When you run the above command, you will see a number of prompts. Answer them as shown to configure it.
Do you want authentication tokens to be time-based (y/n) y
Do you want me to update your "/home/user/.google_authenticator" file (y/n)? y
After you enter your choices, the application provides you with a secret key, verification code, and recovery codes. Please keep these keys in a secure location as this is the only way to recover your access if you lose your mobile device.
It will also display a QR code on the screen. We will need it in our next step.
2. Setup Mobile Phone Authentication
Next, we need to setup our mobile for authentication. Go to Play store or iTunes and search for Google Authenticator mobile app. Install the application on your device.
Now open Google Authenticator on your mobile device and scan the QR code displayed on the terminal screen, as mentioned above.
Once the QR code scan is complete, the Google Authenticator app show you a random number that you need to use to connect to your SSH server, every time.
After this step, Google authenticator will link your remote Linux system to your mobile device.
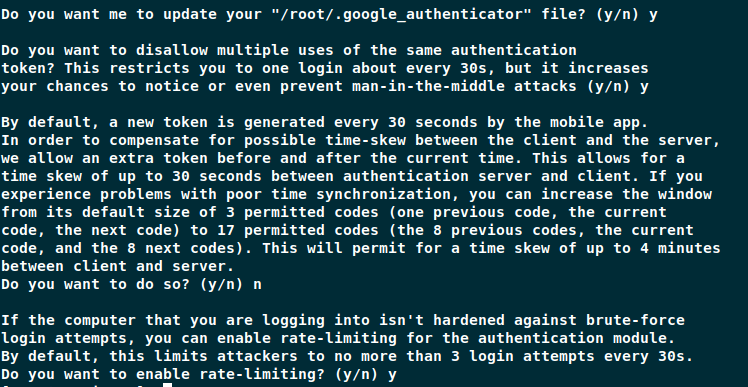
3. Complete Google Authenticator Setup
On your Linux system, you will see some more prompts. Answer them as shown below.
4. Configure SSH to Use Google Authenticator
At this point, we have configured your remote Linux system and mobile to work with Google Authenticator. Next, we will configure the SSH server to work with Google Authenticator. We have assumed that you already have a working SSH connection. Open terminal on your remote server.
$ sudo vi /etc/pam.d/sshd
Add # to comment out the following line from it. This will disable password authentication.
#auth substack password-auth
Next, add the following line to it. This will allow authentication via Google Authenticator.
auth sufficient pam_google_authenticator.so
Save and close the file. Next, open and edit /etc/ssh/sshd_config file.
$ sudo vi /etc/ssh/sshd_config
Search for ChallengeResponseAuthentication and change it to Yes. This will enable 2FA.
ChallengeResponseAuthentication yes
Search for PasswordAuthentication and change it to no. This will disable password authentication.
PasswordAuthentication no
Lastly place the following line in this file.
AuthenticationMethods publickey,password publickey,keyboard-interactive
Save and close the file. Run the following command to restart SSH server.
$ sudo systemctl restart sshd
5. Test 2FA for SSH
Now from another client machine (not remote server) try logging into remote server via SSH using the following command. Replace user with username and example.com with your SSH server’s IP or host address.
$ ssh user@example.com
You will see the following prompt.
Verification code:
Open Google Authenticator and you will see the following kind of random code. Enter it for verification code above.
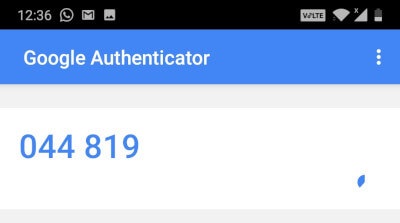
Please note, this code changes every few seconds so you need to enter it quickly. After the time limit, a new code will be displayed. If you are unable to enter the code within time limit, you will need to enter the next code. You get 3 attempts at it. If you keep entering the wrong code, you will get ‘Permission Denied’ message.
$ ssh user@example.com

Verification code:
Verification code:
Verification code:
Permission denied (keyboard-interactive).
If you enter the right code, you will get access immediately.
It is advisable to keep the Google Authenticator on before you enter the command on client machine to connect to remote SSH server.
Also read:
How to Delete All Text in File in Vi Editor
How to Edit Hex File in Linux
Related posts:

Sreeram has more than 10 years of experience in web development, Python, Linux, SQL and database programming.