WAMP is a popular web development solution for Apache/PHP websites. It allows you to setup multiple websites and domains on a single server.
How to Create Virtual Host on WAMP
Here are the steps to create virtual host on WAMP.
1. Create Website Folder
Create the root folder for your website at a location of your choice. For our example, we will use the path C:/wamp/www/example1
Also read : Apache HTTP Server vs Apache Tomcat
2. Open WAMP and Create Virtual Host
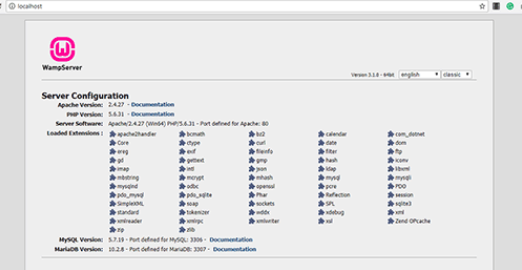
Start WAMP server, open browser and go to http://localhost to view its dashboard. You will see the following screen.
Scroll down the screen and click on “Add a Virtual Host”.

You will see the following screen. Enter domain (e.g. www.example.com) and root location of your website. Please provide absolute path while specifying the root folder of your website (e.g. c:\wamp\www\example1)
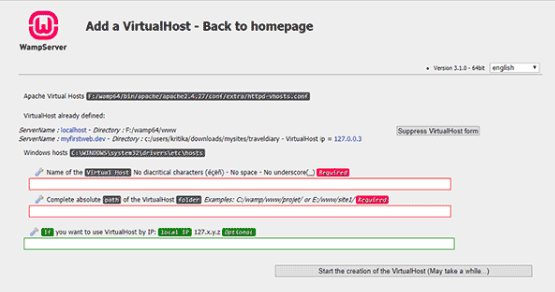
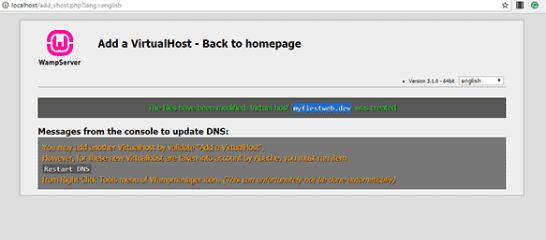
Click on “Start the creation of virtual host”.
Also read : How to Create Virtual Host in XAMPP
3. Clear local DNS
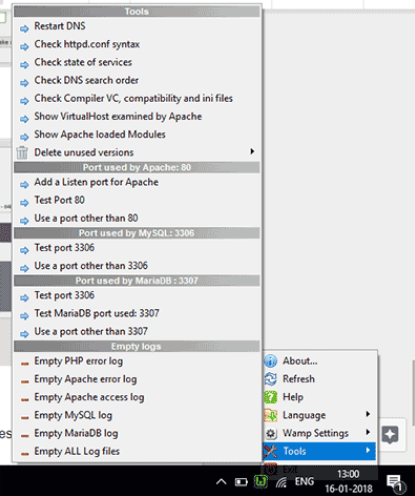
To access this virtual host, we need to restart DNS server under WAMP. Open command line and run the following command to do so.
ipconfig /flushdns
You can also right-click WAMP icon in system tray to view the available option menus. Go to tools->restart DNS
Also read : How to Enable HTTP Strict Transport Security Policy in Apache
4. Restart WAMP
Restart WAMP server to apply changes. Open web browser and visit your domain http://www.example.com. You will see its home page content.
If you want to add multiple virtual hosts on your server, then repeat the above steps again for each virtual host.
That’s it. As you can see it is quite easy to create virtul hosts in WAMP, and run multiple websites with a single instance of server.
Also read : How Does RewriteBase Work in Apache
Related posts:
How to Enable PHP in Apache
How to Make Directory Inaccessible with .htaccess
How to Run Python Script in Apache Web Server
How to Install mod_wsgi in Apache
How to Disable GZIP Compression in Apache
How to Remove URL Parameters using .htaccess
How to Change Apache Log Level
How to Change Default Page in .htaccess

Sreeram has more than 10 years of experience in web development, Python, Linux, SQL and database programming.