
If your system infrastructure uses solid state devices, then as a system administrator you will be required to regularly monitor their health. In this article, we will look at how to easily check SSD health in Linux using command line tool smartctl which is part of smartmontools . Although there are many GUI based tools for this purpose, we will use a command line tool since most Linux systems do not have a desktop.
How to Check SSD Health in Linux
Here is how to use smartmontools (smartctl) in Linux.
1. Install smartmontools
Open terminal and run the following command to install smartmontools. It is a package of many tools out of which we will use smartctl utility.
$ sudo apt install smartmontools
2. Check SSD Health
You can easily get information about your SSD with the following command where ssdx is the name of your SSD.
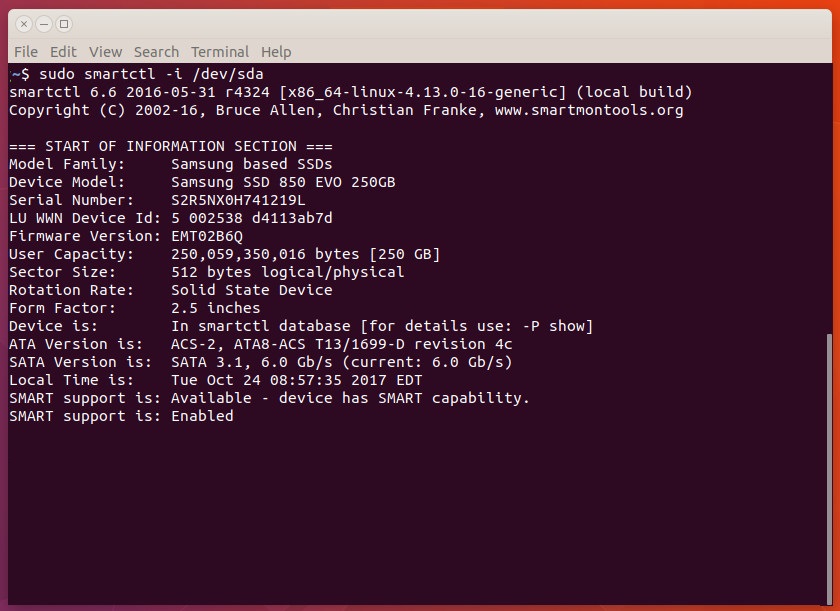
$ sudo smartctl -i /dev/ssdx
You will see the following kind of output that displays a lot of useful information about your SSD along with its status.
You can also run short & long tests on your SSD to get more detailed information about their performance. Here is the command to run a short test on your SSD to quickly check its performance.
$ sudo smartctl -t short -a /dev/ssdx
You will see the following output for your SSD.
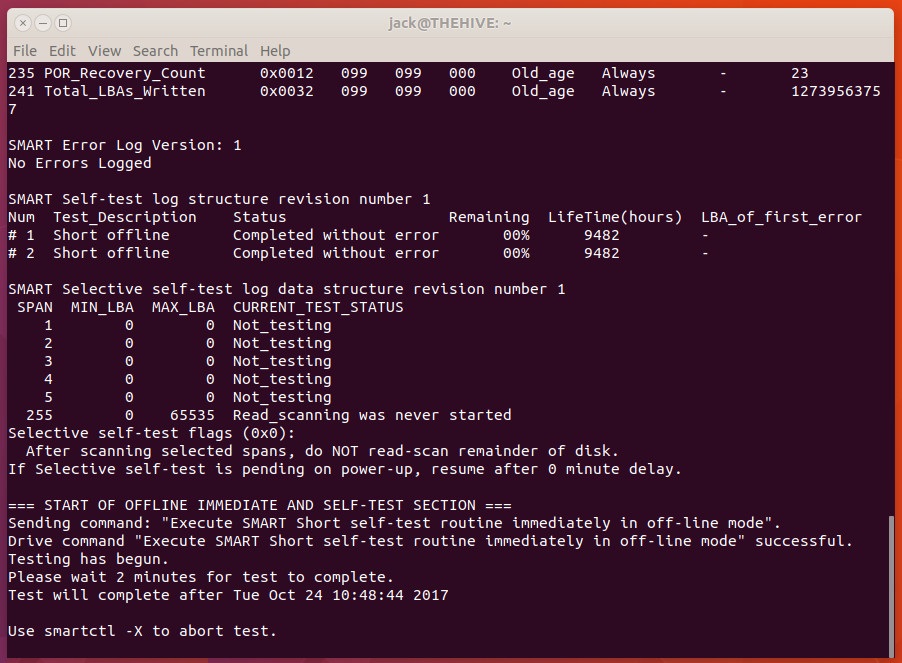
The short test includes a SMART self-health assessment. If it does not say PASSED, it means something is wrong. The short test checks the following:
- Electrical Properties: The controller tests its own electronics specific to each manufacturer.
- Mechanical Properties: Servos and positioning mechanisms are tested specific to each manufacturer.
- Read/Verify: Sample area of the disk will be read to verify data integrity. It is a sample disk are check, not a full one.
Although the above tests are specific for each manufacturer, smartctl is able to customize them for all popular SSD manufacturers.
Short tests take around 2 minutes to complete.
Similarly, here is the command for long test which is much more detailed that short test.
$ sudo smartctl -t long -a /dev/ssdx
Long tests include all the checks done during short tests and also include
- No time restriction in the Read/Verify segment.
- Full Disk Check
Long tests take around 20-60 minutes.
To view the test results, run the following command after the test.
$ sudo smartctl -a /dev/ssdx
You will get the following kind of output.
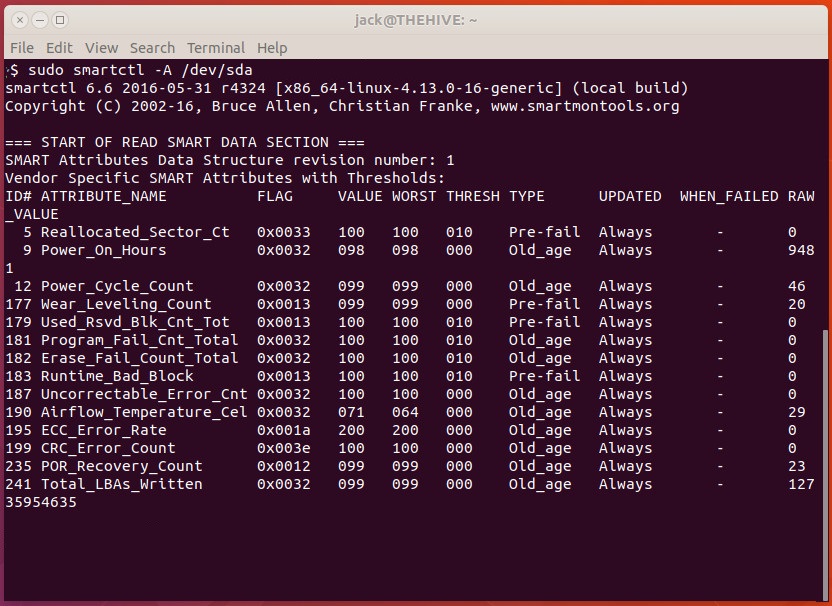
In the above output, pay attention to the following:
- Power_On_Hours – Number of hours the SSD has been running. Every SSD has large but finite shelf life, that, is, maximum number of hours it can run before it needs to be replaced.
- Wear_Leveling_Count – Stands for remaining endurance of SSD. It starts from 100 for new disk and decreases over time.
That’s it. In this article, we have learnt how to check SSD health using smatctl tool. It is important to regularly run short and long tests for your SSD to get detailed information about it.
Also read:
How to Set Default Gateway in Linux
How to Touch All Files in Directory
How to Exit For Loop in Shell Script
How to Set Default Python Version in Ubuntu
How to Install MediaWiki with NGINX in Ubuntu

Sreeram has more than 10 years of experience in web development, Python, Linux, SQL and database programming.