WordPress is a popular blogging and content management system used widely by individuals as well as organizations around the world. It is always a good practice to regularly backup your WordPress files and data so that you can easily recover everything, in case of hardware failure, software corruption or data loss. Typically, many people backup WordPress to cloud-based services such as Google Drive or Dropbox. In this article, we will learn how to backup WordPress to Dropbox.
How to Backup WordPress to Dropbox
Here are the steps to backup WordPress to Dropbox. We have assumed that you already have a WordPress website up & running, and you also have Dropbox account.
1. Install WordPress Plugin
Go to your WordPress Admin. Go to Plugins-> Add New. Search for ‘WordPress Backup to GitHub’ and install the plugin with the same name.
2. Authorize Dropbox
No matter which plugin you install, you will need to invariably authorize the plugin to be able to sync data with your Dropbox account.
Go to the settings page of the newly installed plugin and connect it to your Dropbox account.
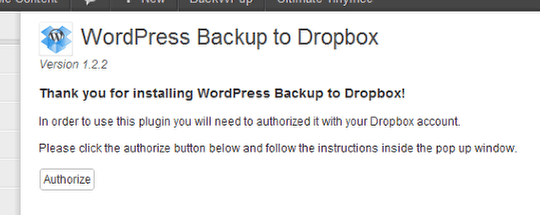
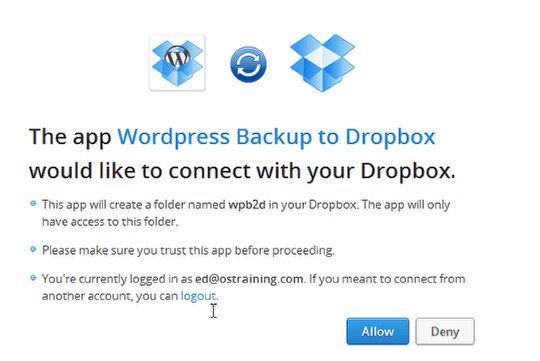
You will be taken to the Dropbox login page in a new window/popup and be asked to provide your login credentials. After you enter correct details, you will see a message saying that an app (WordPress Plugin) wants to connect to your Dropbox account. Click Allow to complete authentication.
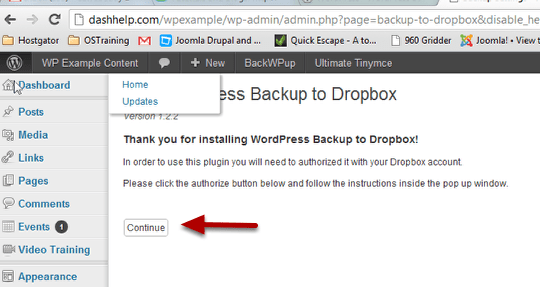
You will see a message that authorization was successful. Close the window and return back to your WordPress Admin where your plugin is being configured. Click Continue to proceed.
3. Configure Backup
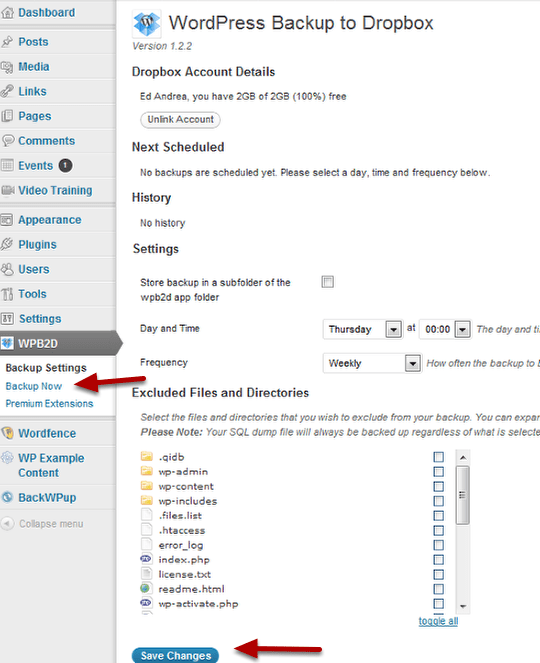
Once you have authorized the plugin, its settings page in WordPress Admin will display the various configuration options available. You can use it to set the backup schedule of plugin. By default, it backs up your data every week. You can also select files & folders to be excluded from backup. Once you have configured the changes as per your requirement.
4. Perform First Backup
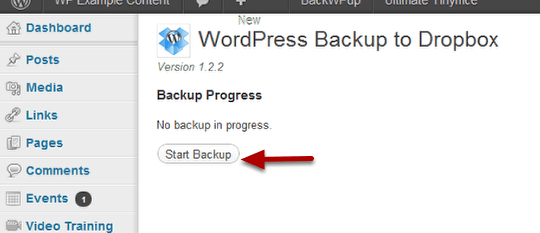
Once the plugin configuration is complete, click Backup Now in WP2BD menu. Click Start Backup. The first backup will take some time, so please wait till it is done, especially if you have a large website. Thereafter, the plugin will only backup the changes since last backup, and so the subsequent backups will be fast.
5. Verify Backup
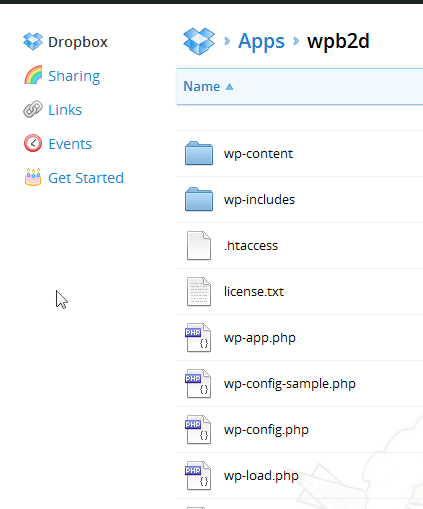
You can verify that all files have been backed up by visiting www.dropbox.com and clicking on Apps folder. In it, you will find a subfolder wpb2d. Double click to open it. You will all files and folders organized as they are on your WordPress web server.
On the other hand, please note, your WordPress website’s database is stored as a .sql database dump file. Its name is [database-name]-backup.sql file and is located in wp-content/backup folder in Apps/wpb2d folder of your dropbox account. So you need to use a database management tool like PHPMyAdmin to restore the .sql database file into your database.
6. Automate backup
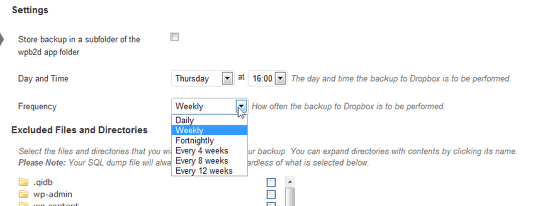
You can set the WordPress plugin to automatically backup your website by setting its backup Frequency as daily/weekly/fortnightly or every 4/8/12 weeks. You can even set the exact time when the backup should happen but it will work only if someone visits your site at that time.
Please note, if there are errors on your website, those files will not be uploaded during automatic backup. You will have to manually upload those files.
If you need to restore any of these files, you can simply download them from your dropbox account to your WordPress website’s folder.
In this article, we have learnt how to backup WordPress website to Dropbox. There are plenty of WordPress Plugins available for this purpose but they all pretty much follow the same process – install plugin, authorize it to access your dropbox account, do first backup, schedule periodic backups. Some plugins also have the option to restore the files from Dropbox.
Also Read:
How to Download Gmail Attachment via Python
How to Read File Line by Line into Python List
How to Backup WordPress to GitHub
How to Backup WordPress to Google Drive
How to Print Without Newline or Whitespace in Python
Related posts:
Shell Script to Backup MongoDB Database
How To Clone Git Repository in Ubuntu
How to Replace All Occurrences of String in JavaScript
How to Redirect Using JavaScript
How to Change Element's Class in JavaScript
How to Take Screenshot of Div in JavaScript
How to connect to MySQL via SSH tunnel in Windows
How to Fix 403 Forbidden Error on Website

Sreeram has more than 10 years of experience in web development, Python, Linux, SQL and database programming.
