Linux users spend a lot of time on Terminal whether it is writing scripts or running tasks, or monitoring processes. Sometimes you may want to customize the terminal’s font size & color according to your convenience. For example, you may want to increase font size because you feel it is too small. You may want to change font color because it is difficult to read. In this article, we will look at how to change terminal font size & color.
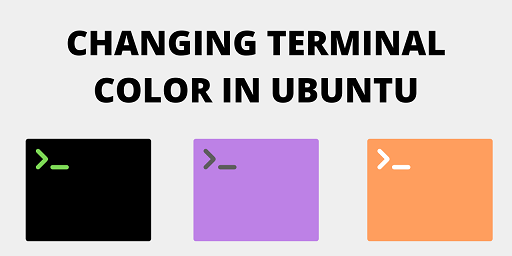
Ubuntu Change Terminal Font Size & Color
Here are the steps to change terminal font size & color.
1. Open terminal
First you need to open terminal window by pressing Ctrl + Alt + T from your desktop. You may also open it from Ubuntu sidebar or using context menu.
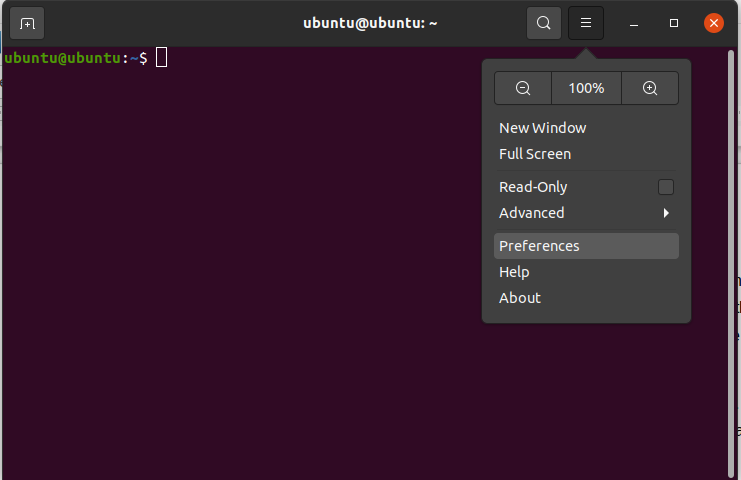
2. Open Preferences
Go to preferences as shown in the screenshot.
Please note, these preferences only change the styling of terminal’s appearance but not its functionality. Preferences section allows you to create separate user profiles, each with their own customization. So you can maintain multiple user profiles for a single terminal window.
Right click on terminal window and you will see ‘Preferences’ option in context menu. You may also access it by clicking the hamburger icon ( 3 parallel lines) on navigation bar of the window.
3. Create Profile
Next, we need to create a new profile to store terminal settings for appearance. You can do so by clicking + icon at the right of Profiles option, on left sidebar.
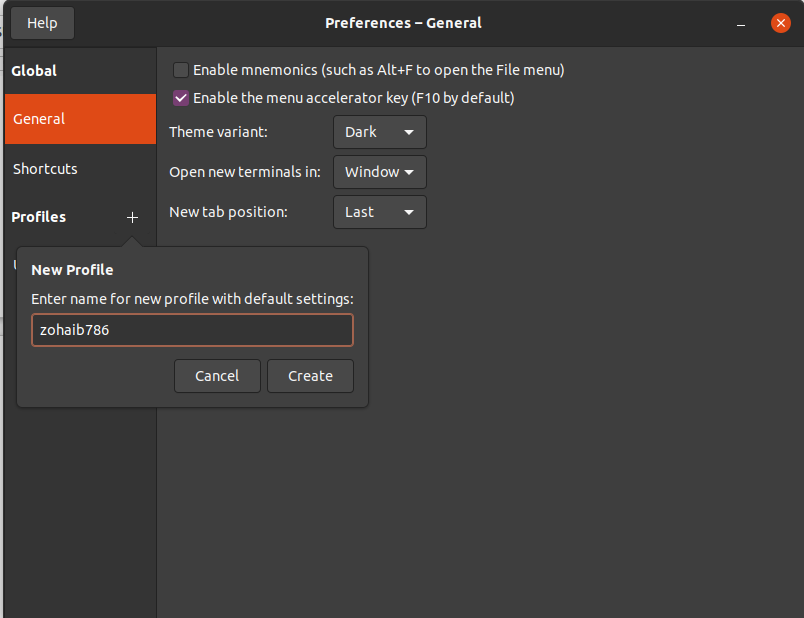
You will be asked to enter a name for the new user profile. Every new profile is assigned default display settings for terminal. You may customize it using the dropdowns & checkboxes shown in the image below. Click Create button to create the new profile.
4. Change Font Settings
Once the profile is created you will see its name listed below Profiles option on the left sidebar. Click your profile name. You will see even more customization options in the right pane.
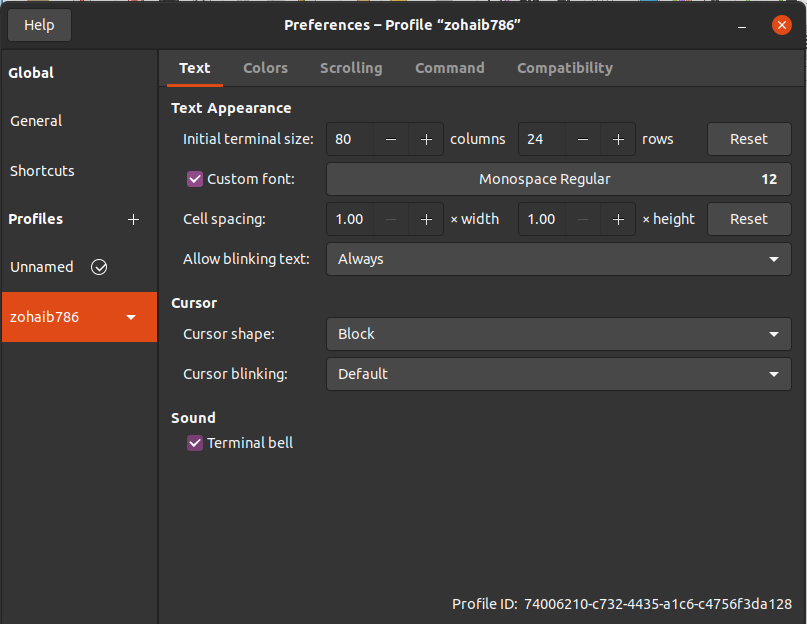
The customization options are split into 5 tabs – text, color, scrolling, command, compatibility. To change text font size, click ‘Custom Font’ checkbox under Text tab. That will allow you to change terminal’s font style and size. There is a wide variety of font styles to choose from the dropdown. When you select a font style, you will see a small window popup with sample texts and font variants. It also contains a setting to adjust the font size according to your requirement.
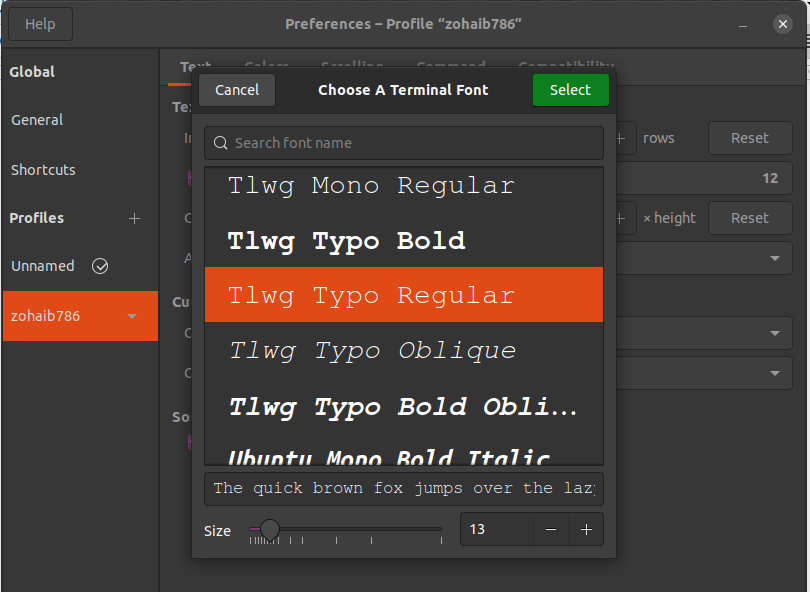
When you are done customizing your font style, click Select.
5. Change Font Color
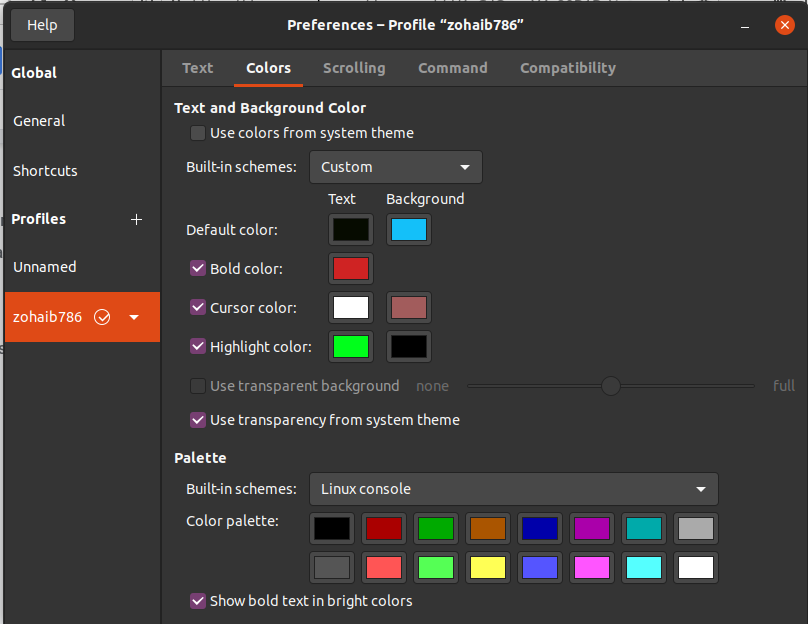
Now go back to the preferences window. Click on Colors tab. You will see all the color-related settings for your terminal.
First, unselect ‘Use colors from system theme’ checkbox in order to be able to customize it. Next, you will see tons of options. You may choose from any of the built-in themes or create your own theme, or simply change a few specific colors like that of cursor, text & highlighting.
6. Change Default Profile
Now that you have created your new profile, it is time to set it as default profile, so that it is automatically loaded for every terminal session and you do not have to manually change it. Click the arrow to the right of your profile name and select ‘Set as default’ option. Restart your terminal and you will see that your new profile has been applied.
In this article, we have learnt how to customize font style & color for terminal. It is quite fun to customize terminal if you use it for a long time every day.
Also read:
How to Remove Sticky Bit in Linux
How to Truncate File In Linux
How to Do Reverse Lookup in Linux
How to SSH Using Pem File in Linux
SCP Command to Copy File Across Server
Related posts:
How to Run Multiple Commands in Linux
How to Setup SSH Tunneling
How to Find Oldest File in Directory
How to Record & Replay Terminal Session in Linux
Sed Command to Delete Lines in Linux
How to Mount Windows Partition in Ubuntu
How to Disable Unnecessary Services in Linux
How to Use Wget to Download File Via Proxy

Sreeram has more than 10 years of experience in web development, Python, Linux, SQL and database programming.