Linux systems can be setup as a second operating system, along with Windows, to create a dual boot system. But sometimes you may need to remove Ubuntu from dual boot. Here are the steps to uninstall Ubuntu from dual boot. You can use these steps with almost every Linux distribution, not just Ubuntu.
How to Uninstall Ubuntu from Dual Boot
We will be removing Ubuntu from Windows dual boot. It is advisable to take a backup of important files & folders on your system, before your proceed further. Also keep a bootable Windows disk or recovery disk handy, to be able to boot into your system, in case something goes wrong.
First, we will change the boot order in UEFI settings and prioritize Windows boot manager. If possible, we will also delete GRUB entry. Then we will delete Ubuntu partitions from Windows.
1. Make Windows the Default Boot Manager
When you install Ubuntu on a Windows system, it will install GRUB boot loader and make Ubuntu as the default operating system. GRUB gives you the option to switch to Windows during boot. On the other hand, the Windows boot manager offers you no such feature to switch between OS during boot. If you set your system to use Windows Boot Manager, it will automatically boot into Windows everytime.
So we will make Windows Boot Manager.
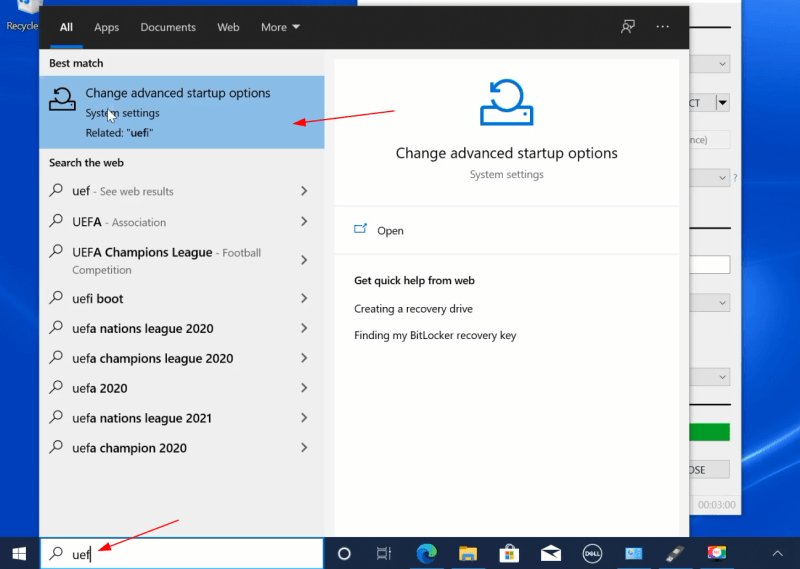
2. Open UEFI settings
Boot into Windows and search for UEFI and go to Change Advanced Setup options from search result.
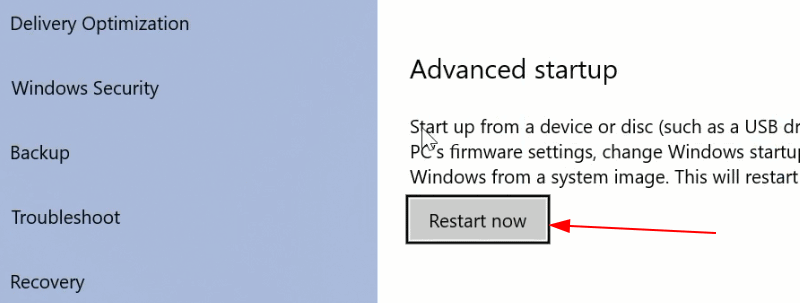
Click on Restart Now.
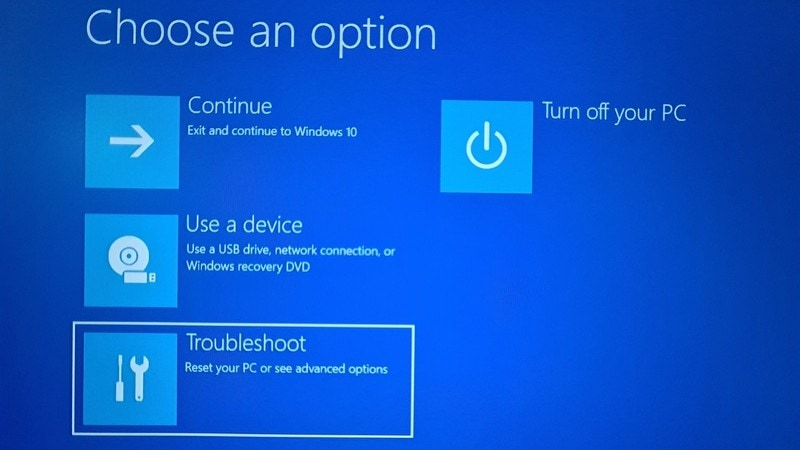
On the next window, click on Troubleshoot.
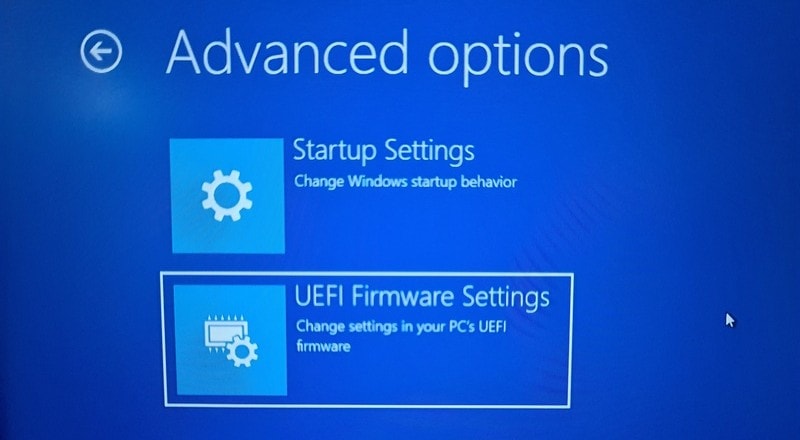
Click Advanced Options
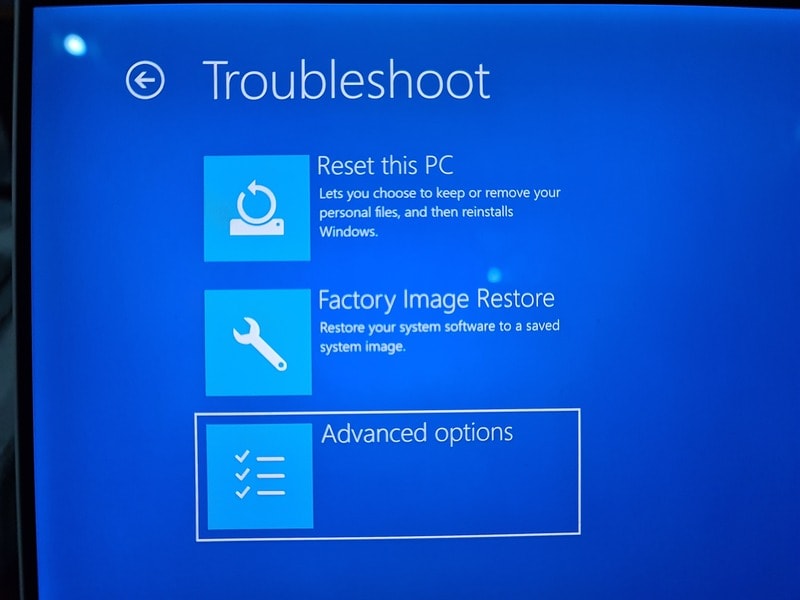
Click UEFI Firmware settings
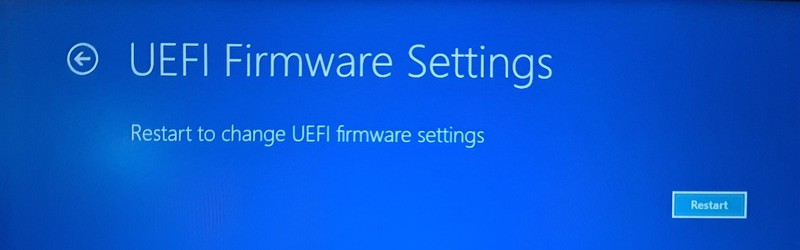
Click Restart Button.
3. Prioritize Windows Boot Manager
System will reboot and go to UEFI settings. It is different, depending on the manufacturer but some items are present in all systems. Go to the Boot tab. All UEFI settings have this page. It will display the available boot loaders on your system.
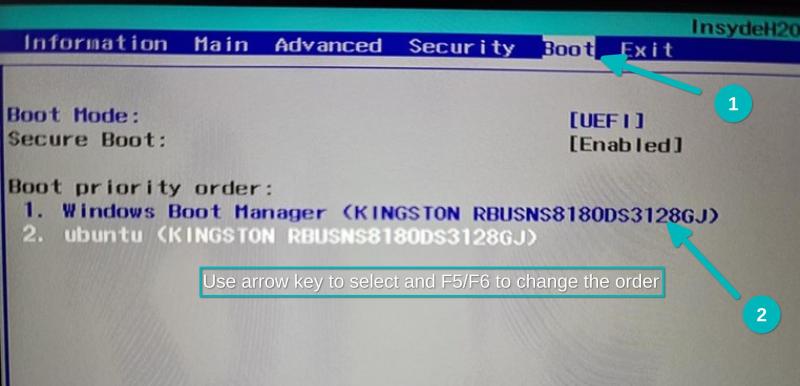
Use arrow keys to go to Windows Boot Manager option, and press F5 key to move it up the order. Then press F10, select save and exit.
Now when you boot your system, it will directly go to your Windows desktop, without offering any option to choose.
From now on, you won’t see any mention of Ubuntu, every time you boot.
4. Delete Ubuntu Partition
Now Ubuntu disk is just another partition on your Windows system that you can delete. Since Windows cannot read it, you can always delete and convert it into free space.
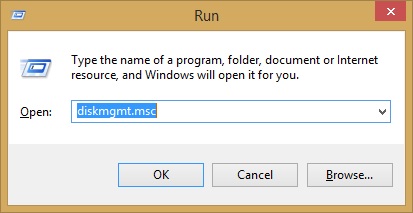
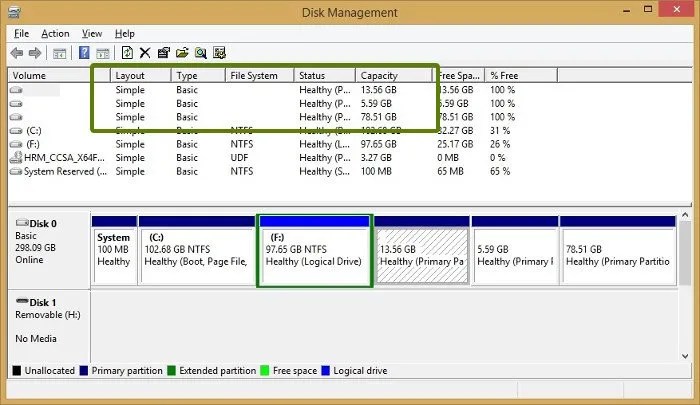
On windows, press windows+R button to open Run command box. Type diskmgmt.msc into it and hit enter. This will open disk management tool and list all the available partitions on your system, both Windows & Linux.
Identify the Linux partitions in the list. They will be the ones without a file system mentioned, since Windows cannot recognize them. Also, their volume column will be blank.
Right click on the partition you want to delete and click Delete Volume from the dropdown menu.
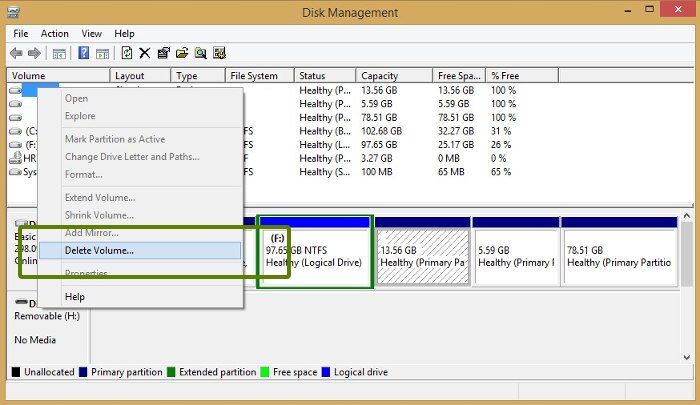
If you see any warning box, click Yes to continue with deletion.

Now you can leave the deleted partition as free space for later use, or convert it into another disk partition for Windows, or extend any of the existing partition into it. If you keep it as a separate partition, then you will have an option to go back to dual boot, if you want to, at some time later.
In this article, we have learnt how to remove Ubuntu from dual boot menu. Basically, you need to set the default boot loader to Windows boot loader, and then delete Ubuntu partitions on your disk.
Also read:
How to Install PHP Composer in Ubuntu
How to List Devices Connected to Your Network in Linux
How to Fix Bash Command Not Found Error
How to Disable Strict Mode in MySQL
Related posts:
How to Deny SSH Access to Users or Groups
How to Kill Stopped Jobs in Linux
How to Change Mac Address in Linux
How to Remove Unused Kernels in Ubuntu
How to Create Startup Disk for Ubuntu
Bash Sort By Column
How to Run Sudo Command Without Password in Linux
How to List Files Installed from RPM or Deb Package

Sreeram has more than 10 years of experience in web development, Python, Linux, SQL and database programming.