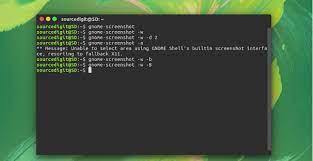
Sometimes you may need to take screenshot in Ubuntu terminal. This is true especially if you are working on a Ubuntu virtual machine that does not have desktop. There are several ways to get screenshot in Ubuntu using just terminal. In this article, we will learn how to take screenshot in Ubuntu terminal.
How to Take Screenshot in Ubuntu Terminal
Here are the steps to take screenshot in Ubuntu terminal. We will see how get screenshot using three different utilities – ImageMagick, Scrot and gnome-screenshot
1. Using ImageMagick
ImageMagick is a handy tool to create images from html, pdf, etc. You can also use it to get screenshot in terminal. Here is the command to install ImageMagick.
$ sudo apt update
$ sudo apt install imagemagick
Once it is installed, use import command to get a screenshot, as shown below. Mention the filename where you want to the screenshot to be stored.
$ sudo import screenshot.png
You will see an area selector by clicking left mouse button & dragging. Select the area whose screenshot you want and click to take screenshot.
You can also supply various options to customize your screenshot. Here is the command to take screenshot after delay, and resize it to a specific size.
$ sudo import -window root -resize 400x300 -delay 200 screenshot.png
2. Using Scrot
Scrot is another utility to take screenshot easily. You can install with the following command.
$ sudo apt-get install scrot
Here is the command to get screenshot and save it as screenshot.png file.
$ sudo scrot MyScreenshot.png
Here also you can use various options as shown below.
$ sudo scrot -b -d 5 '%Y:%m:%d:%H:%M:%S.png' -e 'mv $f ~/Desktop/'
In the above command,
- -b – use border
- -d 5 – delay of 5 seconds
- %Y:%m:%d:%H:%M:%S – timestamp of screenshot used in filename
- -e ‘mv $f ~/Desktop/’ – move to /Desktop/ after screenshot is taken. -e option allows you to execute commands after screenshot is generated.
This is really useful if you want to take automated screenshots of errors in your applications/websites.
3. Using gnome-screenshot
You can also use gnome-screenshot to take screenshots in Ubuntu terminal. Here are the commands to install gnome-screenshot in Ubuntu.
$ sudo apt-get update -y

$ sudo apt-get install -y gnome-screenshot
Open terminal and run the following command.
$ gnome-screenshot
Here is the command to take screenshot after delay of 5 seconds.
$ gnome-screenshot -d 5
Here is the command to take screenshot of current window.
$ gnome-screenshot -w
You can use the following command to get all available options in gnome-screenshot.
$ gnome-screenshot --help
That’s it. In this article, we have seen several ways to easily take screenshot in Ubuntu terminal. You can use these tools even if your Ubuntu does not have desktop.
Also read:
How to Make Cross Database Queries in PostgreSQL
How to Make Cross Database Queries in MySQL
How to Copy/Transfer Data to Another Database in PostgreSQL
How to Count Repeated Characters in Python String
How to Write Limit Query in MongoDB
Related posts:

Sreeram has more than 10 years of experience in web development, Python, Linux, SQL and database programming.
