Often Ubuntu users may need to install printer in their systems. While many Ubuntu systems auto detect printers on connection, in this article, we will learn how to install printer in Ubuntu through GUI. It is also possible to install printer in Ubuntu through terminal but that is cumbersome. It is a lot easier to do it via GUI.
How to Install Printer in Ubuntu Through GUI
Here are the steps to add printer to Ubuntu/Debian.
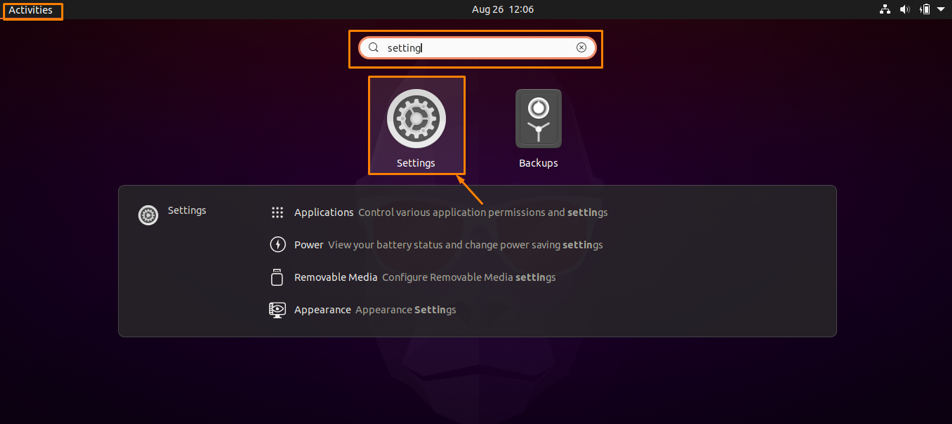
1. Open Settings
Log into Ubuntu system, open Activities overview and in the search box, enter Settings. You will see the Settings option in suggestions. Click on it to open Settings.
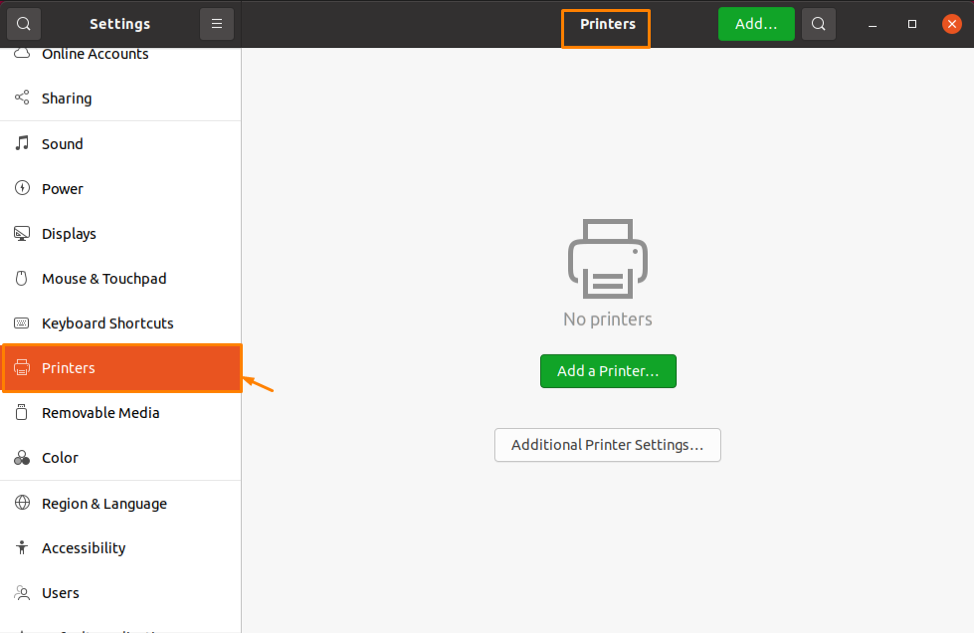
2. Open Printer Settings
In the settings window, click Printers option on left side and printer settings will be opened.
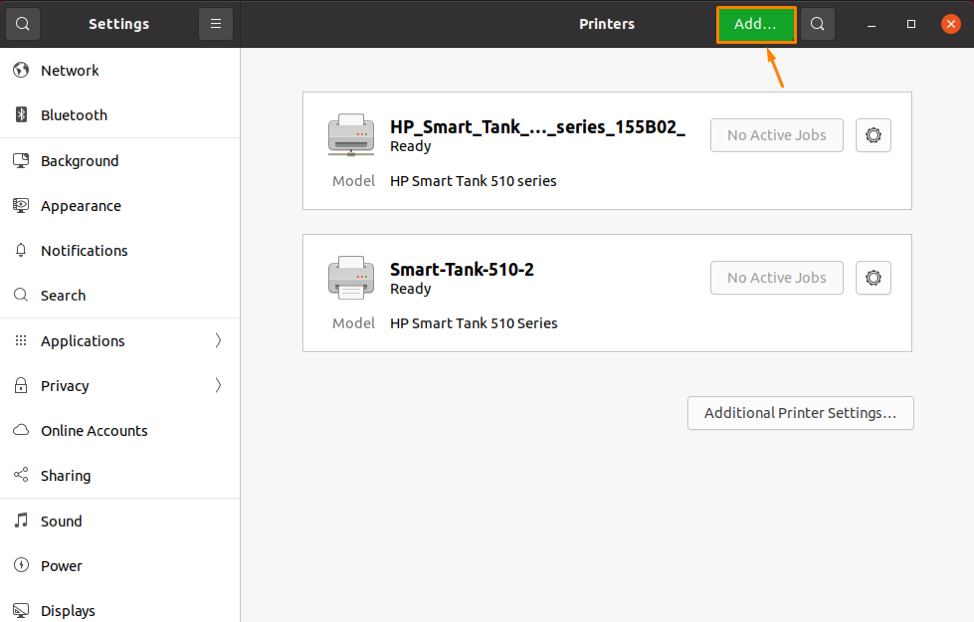
3. Find and Connect to Printer
Next click Add button from top navigation bar to add a new printer to your system.
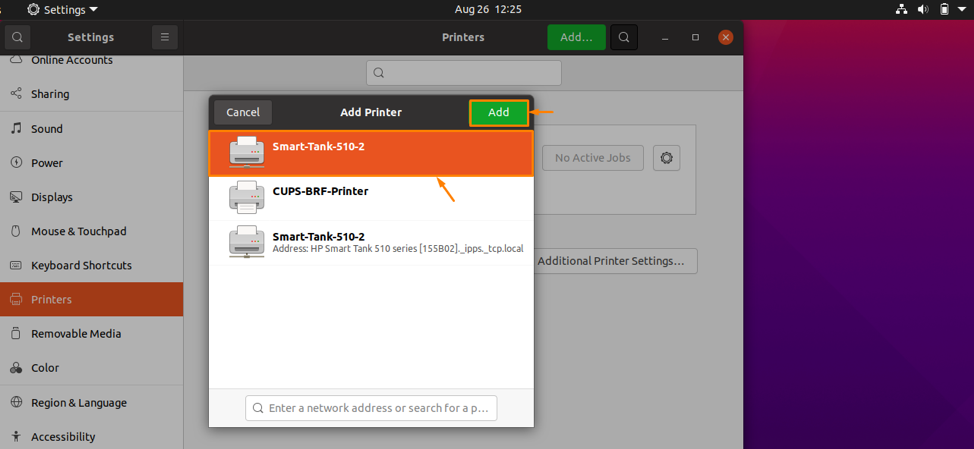
You will see a popup that lists all available printers. Select the printer you want to add and click Add button to add the printer to your system.
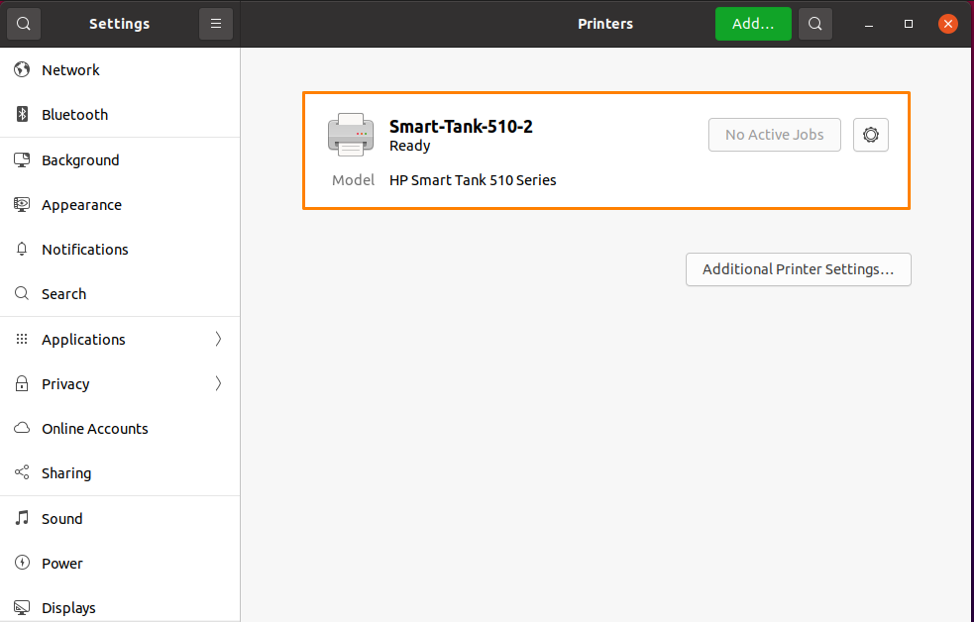
4. Verify Connection
Once the printer is added to your system, its status will be displayed as Ready, and then you can use it to print what you want.
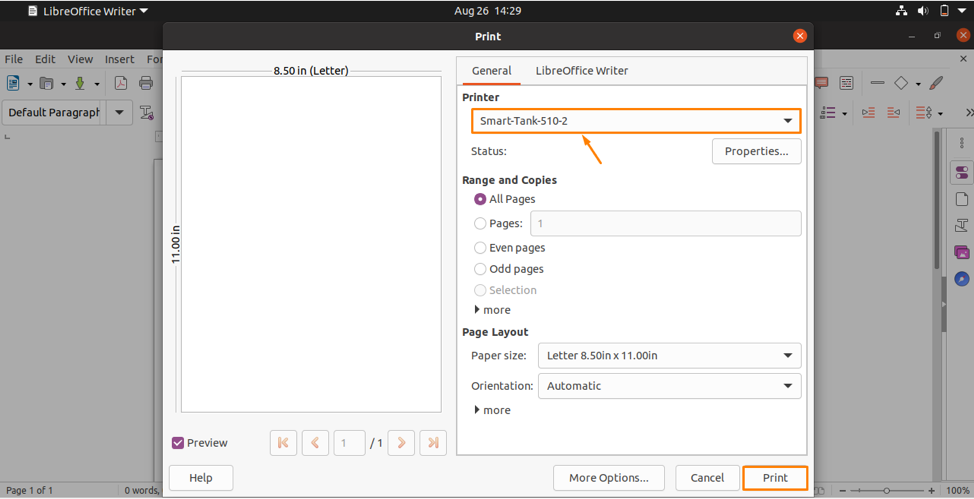
5. Configure Print Setting
You can configure the print setting of any document that you want to print. For this purpose, open the document in document editor such as MS Office, or Libre Office. Next, open the File menu and click Print from dropdown list. You will see print settings, where you can customize your document’s print settings and click Print to apply them and start printing.
In this short article, we have learnt how to add printer to Ubuntu/Debian systems.
Also read:
How to Increase SSH Connection Limit in Linux
How to Disable Root Login in Linux
How to Disable Su Access to Sudo Users
How to Install Printer in Ubuntu Through Terminal
How to Unlock User Account in MySQL