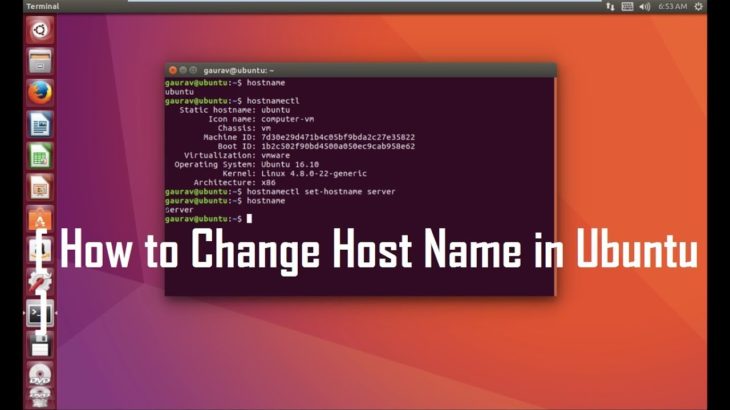
Hostname is a label that identifies your system on a network. By default, the operating system assigns a hostname for every system on a network. But sometimes you may need to change the hostname to make it easy for others to identify your system on the network. In this article, we will look at how to change host name in Debian/Ubuntu Linux.
How to Change Host Name in Debian/Ubuntu
Here are the steps to change host name in Debian/Ubuntu. There are different ways to change your system’s host name in Linux. But there are a few format restrictions you need to follow when you assign host name.
- They should have minimum of 2 and maximum of 63 characters.
- They can contain only alphabets, digits and hyphens.
- They cannot start or end with hyphens, and they cannot have consecutive hyphens.
You can check your current hostname with the following command.
$ hostname
ubuntu-01
Now we will look at how to change host name temporarily, as well as permanently.
Change Host Name Temporarily
You can temporarily change hostname using hostname command, followed by your system’s new hostname. In this case, the host name will revert back to its old value on system reboot.
Here are the steps to change host name temporarily.
You need sudo/root privileges to be able to change hostname. Switch to root/sudo user.
$ sudo -s
Use hostname command to change hostname to new-ubuntu.
$ hostname
new-ubuntu
In the above command, we have entered the new hostname after hostname command. Please note, your Linux system will not return any message if it has successfully changed hostname. It will return a response only if there is any error.
So run hostname command once again to check your system’s new hostname.
$ hostname new-ubuntu
Change Hostname permanently
There are two ways to permanently change host name – using hostnamectl command and by editing the hostname file. In both cases, you need to modify your system’s hosts file to reflect the changes in hostname.
Open terminal and run the following command to open system’s hosts file in a text editor.
$ sudo vi /etc/hostname
The first line of this file will list your system’s current hostname. Change it to the new hostname. Save and close the file.
Alternatively, you may also use hostnamectl command to change hostname. Here is its syntax. Replace [name] with your system’s new hostname.
$ hostnamectl set-hostname [name]
Next, open the /etc/hosts file in a text editor.
$ sudo vi /etc/hosts
In that file, replace all occurrences of your system’s old hostname with its new one.
Restart hostname shell script with the following command to apply the above changes.
$ invoke-rc.d hostname.sh start
Hostname with special characters
Although you are allowed to use only hyphens, alphabets and digits in your system’s hostname, you can include special characters and spaces, by using –pretty option with hostnamectl command, as shown below.
$ hostnamectl set-hostname "[name]" --pretty
Here is an example.
$ hostnamectl set-hostname "ubuntu's system" --pretty
In this article, we have learnt how to change system’s hostname temporarily as well as permanently. It is useful to have an intuitive hostname if you want to be easily discovered on your network, especially on your office or college network.
Also read:
How to Send GET & POST requests using Python
How to Create Swap File in Linux
SFTP Script to Transfer File in Linux With Password
How to Reverse String in Python
How to Connect to PostgreSQL database in Python
Related posts:
How to Get Hostname/Domain Name from IP Address in Linux
How to Upload & Download Files From FTP in Linux
How to Save Dictionary to File in Python
How to Display Specific Columns in Linux
How to Generate & Verify MD5 Hash of File in Linux
How to Copy Files from Linux to Windows
How to Setup SSH Passwordless Login
How to Unzip File in Linux

Sreeram has more than 10 years of experience in web development, Python, Linux, SQL and database programming.
