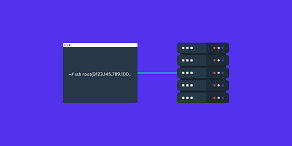
Generally, SSH login requires password authentication. Sometimes you may need to login with SSH without using password. In this article, we will look at how to setup SSH passwordless login, using a key-based authentication.
How to Setup SSH Passwordless Login
Here are the steps to setup SSH passwordless login. Basically, you need to generate a public key and append it to remote host’s ~/.ssh/authorized_keys file.
1. Look for existing SSH keys
Open terminal and run the following command to check if there are any existing SSH keys in your system. We do not want to overwrite any existing SSH keys.
$ ls -al ~/.ssh/id_*.pub
If the above command lists any keys, then you can use those kys and skip the next step. If you see “No such file or directory” message it means there are no SSH keys on your system.
2. Generate new SSH key pair
Run the following command to generate an SSH key pair. Replace email@domain.com with the email address of your website administrator.
$ sudo ssh-keygen -t rsa -b 4096 -C "email@domain.com"
When you see the following prompt, press enter to use default file paths and location. In your case, username will be replaced with your linux username.
Enter file in which to save the key (/home/username/.ssh/id_rsa):Next, you will see a prompt that asks you if you want to enter passphrase. If you don’t want to use passphrase then press enter only. In this case, you won’t be asked for a passphrase every time you login via SSH. If you need automated SSH logins, then it is advisable to use SSH login without passphrase.
Enter passphrase (empty for no passphrase):You will see a message saying that your key has been generated and saved at /home/username/.ssh/id_rsa. Here username will be different depending on your Linux username.
Run the following command to list your new private and public keys.
$ ls ~/.ssh/id_*
You will see the following output.
/home/username/.ssh/id_rsa /home/username/.ssh/id_rsa.pub3. Copy Public Key
Next, you need to copy your new public key to the server you want to manage. You can do this using ssh-copy-id command. Replace remote_user below with your remote user name, and server_ip with your remote server’s IP.
$ ssh-copy-id remote_user@server_ip
Once you have authenticated, the above command will automatically append your public key to remote user’s authorized_keys file.
If you don’t have ssh-copy-id on your system, then use the following command to copy public key.
$ sudo cat ~/.ssh/id_rsa.pub | ssh remote_username@server_ip_address "mkdir -p ~/.ssh && chmod 700 ~/.ssh && cat >> ~/.ssh/authorized_keys && chmod 600 ~/.ssh/authorized_keys"
4. Login to remote server
Run the following command to login to your remote server.
$ sudo ssh remote_user@server_ip
5. Disable Password Authentication
After you login to remote server using public keys, open the following file. Do this only if you are able to successfully log into remote server using public keys. If you are unable to login using public keys and if you disable password authentication, then you will be locked out of your system.
$ sudo vi /etc/ssh/sshd_config
Look for the following lines and modify them such that their values are ‘no’.
PasswordAuthentication noChallengeResponseAuthentication noUsePAM no
Save and close this file.
6. Restart SSH service
Restart SSH Service to apply changes.
Ubuntu/Debian
$ sudo systemctl restart ssh
Redhat/Fedora/CentOS
$ sudo systemctl restart sshd
Now you will be able to login to remote server via SSH, without using password, using public key authentication.
Also read:
How to Change NGINX User
How to Remove URL Parameters using .htaccess
How to Set Apache PATH Environment Variable
How to Export to CSV in NodeJS
How to Make POST Request using cURL
Related posts:
Bash Sort By Column
How to Deny SSH Access to Users or Groups
Su vs Sudo in Linux
How to Display Specific Columns in Linux
How to Send Email With Attachment in Linux
How to Enable Syntax Highlighting in Vim
How to Recursively Download Files & Folders in Wget
SCP command in Linux to copy file from one server to another

Sreeram has more than 10 years of experience in web development, Python, Linux, SQL and database programming.
