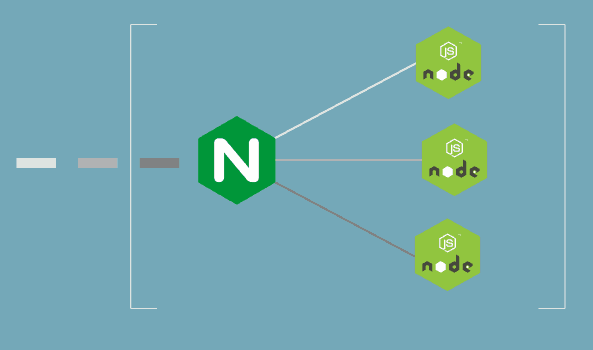
NodeJS is a popular JS-based framework to develop web applications. NGINX is a high performance HTTP server that is also used as reverse proxy web server and load balancer. If you are developing web applications using NodeJS it is highly recommended that you run them behind an NGINX reverse proxy server. In this article, we will look at how to use NGINX as reverse proxy for NodeJS
How to Use NGINX as Reverse Proxy for NodeJS
Here are the steps to use NGINX as Reverse Proxy for NodeJS.
1. Install NodeJS
If you have already installed and configured a NodeJS application, skip to step #3. Otherwise, open terminal and run the following commands to install NodeJS and its package manager NPM.
Ubuntu/Debian
The following commands will automatically install the latest versions of NodeJS and NPM on your system.
$ sudo apt-get update
$ sudo apt-get install nodejs
$ sudo apt-get install npm
Redhat/CentOS/Fedora
In case of Redhat/CentOS/Fedora systems, you need to download & install the appropriate package on your own. For example, here is the command to install NodeJS v12
$ yum -y install -y curl
$ curl -sL https://rpm.nodesource.com/setup_12.x | bash -
If you want to install NodeJS version 13 then replace 12 with 13 in the above command.
Check NodeJS version to confirm installation.
$ node -v
Also read : How to Convert Image to PDF in Linux
2. Create NodeJS Application
For our article, we will create a simple NodeJS application that responds with “Hello World” message when you send a request to it. We need to run this application on a port other than HTTP port 80, since NGINX will be running on it. So we will run our NodeJS application on port 8080.
Run the following commands to create a server.js file at /var/www/html folder
$ sudo vim /var/www/html/server.js
Add the following lines of code to server.js file. Replace 127.0.0.1 with your server’s IP address. Replace 8080 with port number that you want to run NodeJS on.
const http = require('http');

const hostname = '127.0.0.1';
const port = 8080;

const server = http.createServer((req, res) => {
	res.statusCode = 200;
  	res.setHeader('Content-Type', 'text/plain');
  	res.end('Hello World\n');
});

server.listen(port, hostname, () => {
  	console.log(`Server running at http://${hostname}:${port}/`);
});
Save and exit file.
Open port 8080 on your firewall and run the above NodeJS app with the following command
$ sudo node /var/www/html/server.js
Server running at http://127.0.0.1:8080
Open your web browser and go to http://127.0.0.1:8080. You will get the response
Hello World
Also read : How to Search in VI Editor
3. Install NGINX
Run the following commands to install NGINX
Ubuntu/Debian
$ sudo apt-get update
$ sudo apt-get install nginx
Redhat/CentOS/Fedora
$ sudo yum install epel-release
$ sudo yum update
$ sudo yum install nginx
Since NGINX runs on port 80, open it on your firewall.
Also read : How to Undo Git Add Before Commit
4. Open NGINX configuration
Open NGINX configuration file in a text editor
$ sudo vi /etc/nginx/nginx.conf
Add the following lines to it. Replace example.com with your domain name. Replace 127.0.0.1 with the IP address of server where your NodeJS application is running. Replace 8080 with the port number on which your NodeJS application is running.
server {
    listen 80;
    server_name example.com;

    location / {
        proxy_set_header   X-Forwarded-For $remote_addr;
        proxy_set_header   Host $http_host;
        proxy_pass         http://127.0.0.1:8080;
    }
}
Save and exit the file. Basically, the above configuration lines cause NGINX to receive requests on port 80 and then forward them to your NodeJS application running on port 8080. This is done using proxy_pass directive.
Also read : How to Install AWS CLI in Ubuntu
5. Restart NGINX Server
Restart NGINX server to apply changes
$ sudo systemctl restart nginx
OR
# systemctl restart nginx
Open browser and go to http://example.com (your domain entered in /etc/nginx/nginx.conf). You will see the response “Hello World”. Please remember to close port 8080 that you had opened to test NodeJS application in step 2.
That’s it. Now NGINX will be able to work with your NodeJS application.
Also read : How to Install git in Ubuntu
How to Install virtualenv in Ubuntu

Sreeram has more than 10 years of experience in web development, Python, Linux, SQL and database programming.
