
Vim (Vi Improved) is a popular text editor in Linux. It is available on almost every Linux system and is used extensively for documentation, coding and other file-related tasks. Vim provides tons of features and customizations that allows users to easily accomplish their tasks and be productive. Typically, people use vim to open and edit one file at a time. But what if you want to open same file in multiple windows? Did you know that vim allows you to do this by splitting its screen vertically and horizontally? In this article, we will learn how to split vim screen vertically & horizontally.
How to Split Vim Screen Vertically & Horizontally
If vim is not installed on your system, run the following command, depending on your system, to split screen vertically & horizontally.
$ sudo apt install vim      [On Debian, Ubuntu & Mint]
$ sudo yum install vim      [On RHEL, CentOS & Fedora]
$ sudo pacman -Sy vim       [On Arch & Manjaro]
$ sudo zypper install vim   [On OpenSUSE]
Once you have installed vim, you can easily open it using the following syntax.
$ vim /path/to/file
Split Vim Vertically
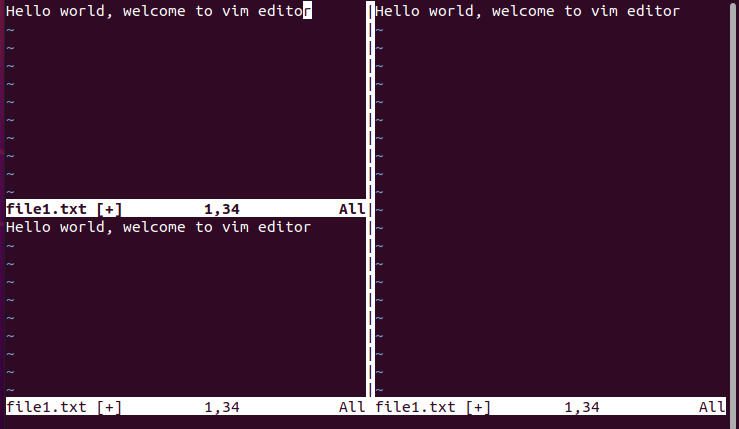
If you have opened vim editor and want to split screen vertically, hit Esc key and then enter Ctrl+w, followed by v key. You will get a vertically split screen as shown below. Basically vim will clone your existing document to a new pane.
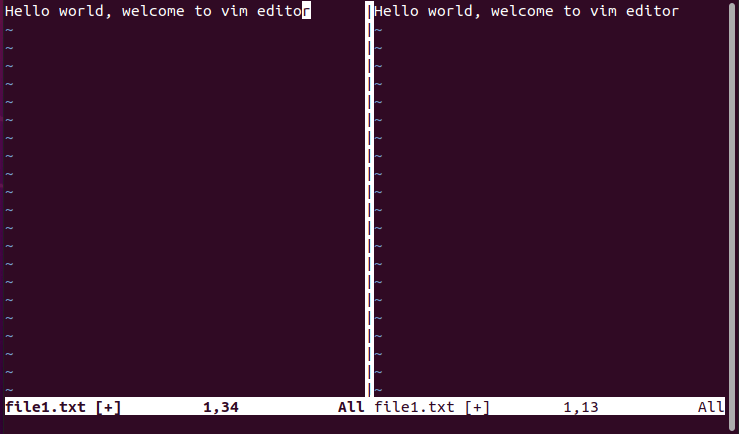
Once you have split screen vertically, you can enter Ctrl+w and then ‘l’ (letter el) to go to right pane. If you want to go back to left pane, enter Ctrl+w and then ‘h’.
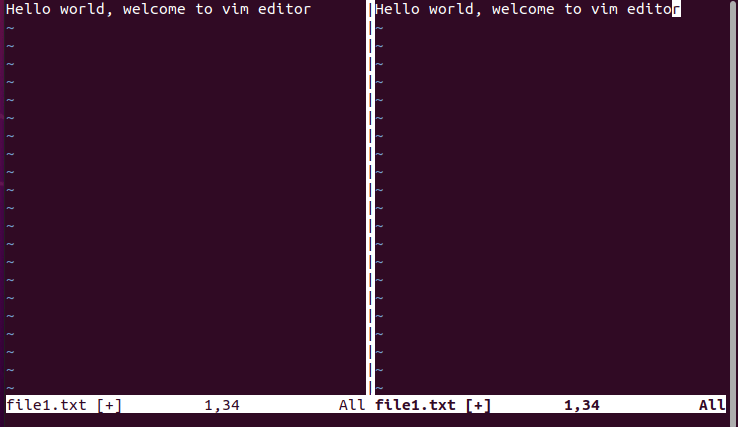
Since all panes have the same color scheme, when you transfer control to a different pane, keep an eye on the cursor to know which pane has the control currently.
Split Vim Horizontally
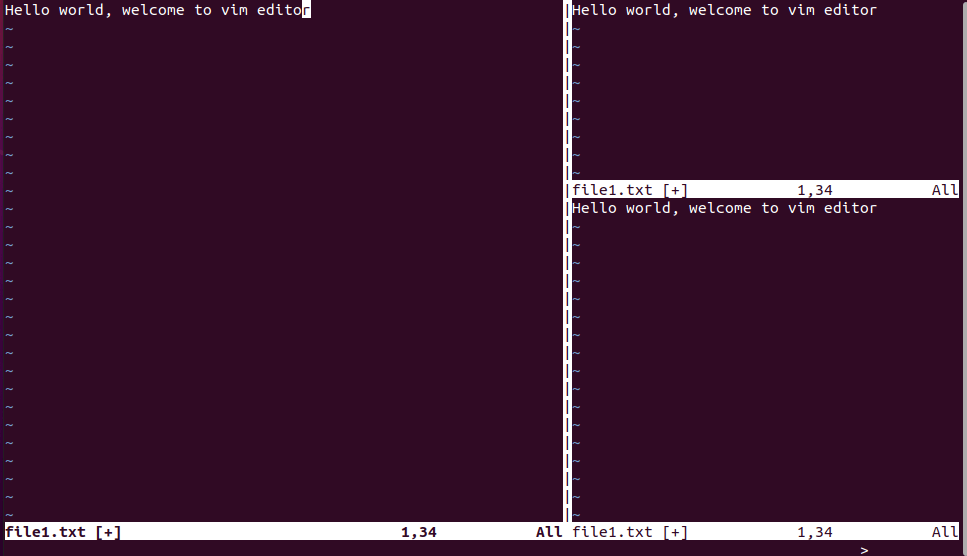
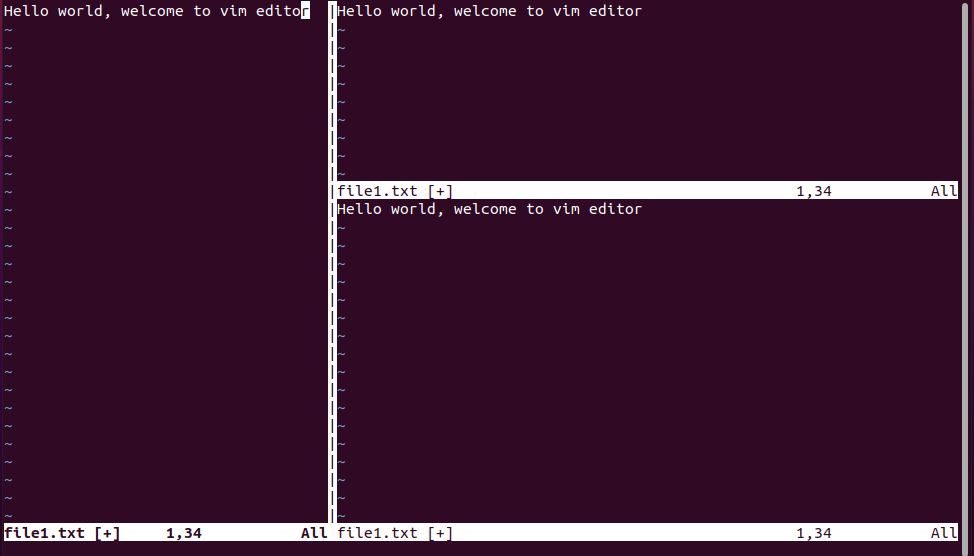
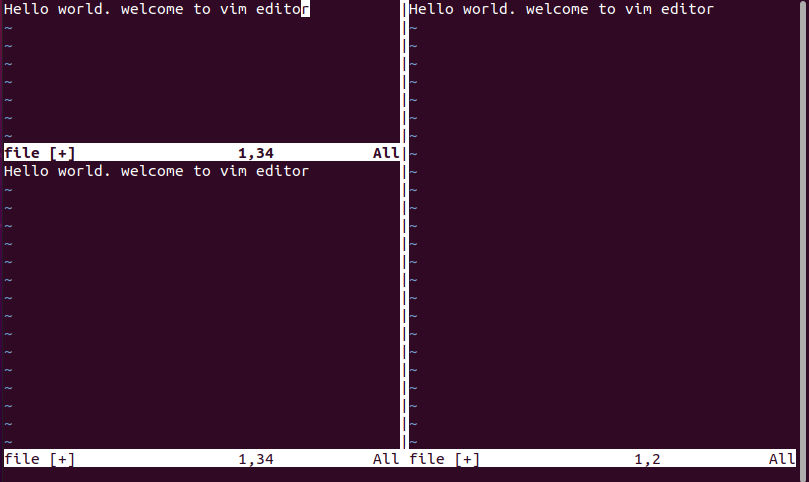
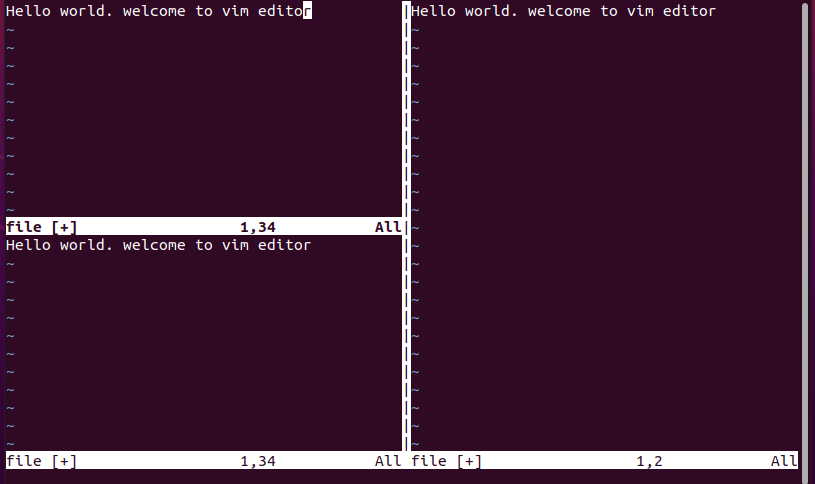
If you want to split vim screen horizontally, enter Ctrl+w, followed by ‘s’. Please note, if your vim is already split, then the above command will only split the active pane on your screen. In the below example, we ran vim splitting on our left pane, so only left pane was split and right pane was left as it is. Whether you have single or multiple panes on your screen, here also, vim will only create a clone of your active pane.
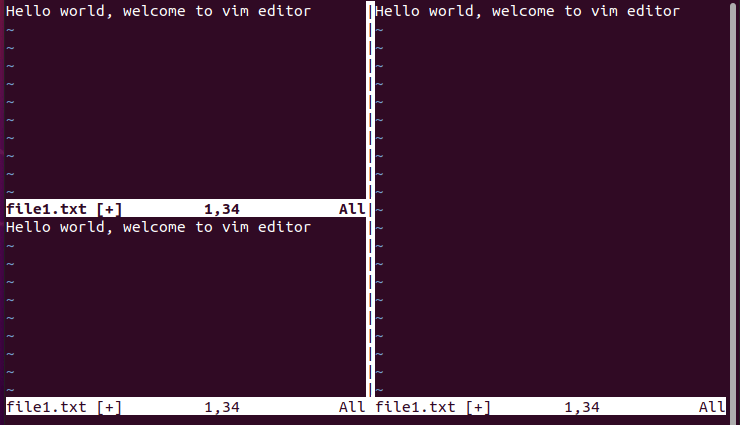
To go to bottom section, enter Ctrl+w, followed by j.
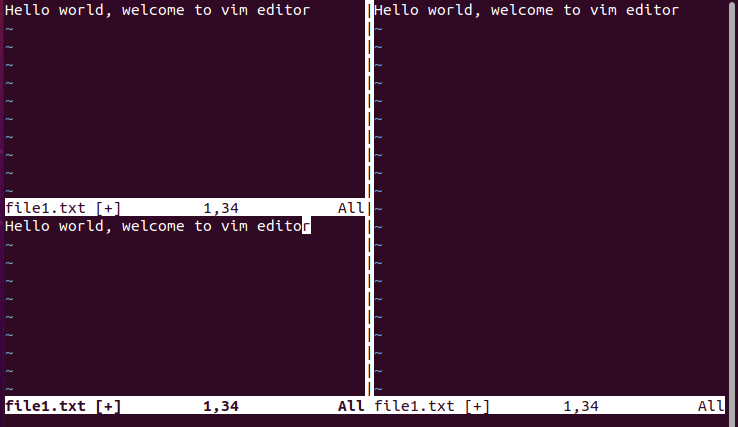
If you want to go back to first section on upper left side, enter Ctrl+w followed by k.
Since all panes have the same color scheme, when you transfer control to a different pane, keep an eye on the cursor to know which pane has the control currently.
Increase Width of Current Pane
If you want to increase the width of current workspace or pane, enter Ctrl+w, followed by SHIFT+> combination.
Similarly, to reduce the width of current workspace or pane, enter Ctrl+w, followed by SHIFT+<.
When the width of one pane increases, the surrounding panes will automatically adjust themselves to accommodate the new width of your pane.
Increase Height of Current Pane
If you want to increase height of current pane, enter Ctrl+w, followed by SHIFT+’+’ key combination.
Similarly, if you want to decrease the height of one pane, then enter Ctrl+w, followed by SHIFT+’-‘ key combination.
When the height of one pane increases, the surrounding panes will automatically adjust themselves to accommodate the new width of your pane.
If you want to equalize the height of upper and lower panes, then enter Ctrl+w, and enter =.
In this article, we have learnt how to split vim screen vertically & horizontally, and also how to increase & decrease width of panes, increase & decrease heights of vim panes. But we have learnt how to view the same file across multiple windows & workspaces. If you need to view multiple files in vim, please refer to detailed article about opening multiple files in vim editor.
Vim is a versatile editor that works with almost every file type. Splitting of vim screen allows you to easily compare the old and new version of your file, side by side, while making changes. It also allows you to jump to different sections of the same file on different panes, using search function, while editing your document. Overall, it is very useful for developers and document creators who want advanced document viewing capabilities.
Also read:
Fix Unable to Mount NTFS Error in Linux
How to Convert PPK to PEM in Linux
Linux History with Timestamp & User
How to Disable Swap in Linux
How to Call C Function in Python