
LogAnalyzer is a popular web interface for viewing syslog and other network event messages. It provides an easy-to-use navigation, real-time reporting and analysis. In this article, we will look at how to setup LogAnalyser with Rsyslog and MySQL. In our last article, we looked at how to setup Rsyslog with MySQL database server.
How to Setup Loganalyzer with Rsyslog and MySQL
Here are the steps to setup LogAnalyzer with Rsyslog and MySQL.
1. Download LogAnalyzer Source
Open terminal and run the following commands to download the latest version of LogAnalyzer from its website. We have downloaded LogAnalyzer version 4.1.5 for our example.
$ cd /tmp
$ sudo wget http://download.adiscon.com/loganalyzer/loganalyzer-4.1.5.tar.gz
$ sudo tar xzf loganalyzer-4.1.5.tar.gz
The above commands will download as well as extract LogAnalyzer tool. Thereafter, we move it to our web server’s default location.
$ sudo mv loganalyzer-4.1.5/src /var/www/html/loganalyzer
Please note, in our previous article, we have installed Apache & PHP whose default server folder is /var/www/html. That is why we move the above extracted folder of LogAnalyzer so that its pages can be served using Apache+PHP.
2. Create LogAnalyzer Config File
Run the following command to create a configuration file named config.php in loganalyzer folder. We also give apache user write permission to modify it.
$ cd /var/www/html/loganalyzer
$ touch config.php
$ chown www-data:www-data config.php     # Use apache for redhat system
$ chmod 777 config.php
If you are using Redhat/Fedora/CentOS system, then update the 3rd command above to use apache user instead of www-data.
3. Create Start LogAnalyzer Web Installer
Now this log analyzer will be available at /loganalyzer folder of your website. For example, if your website is http://www.mysite.com then open browser and go to http://www.mysite.com/loganalyzer/install.php to start its web installation.
http://www.mysite.com/loganalyzer/install.php
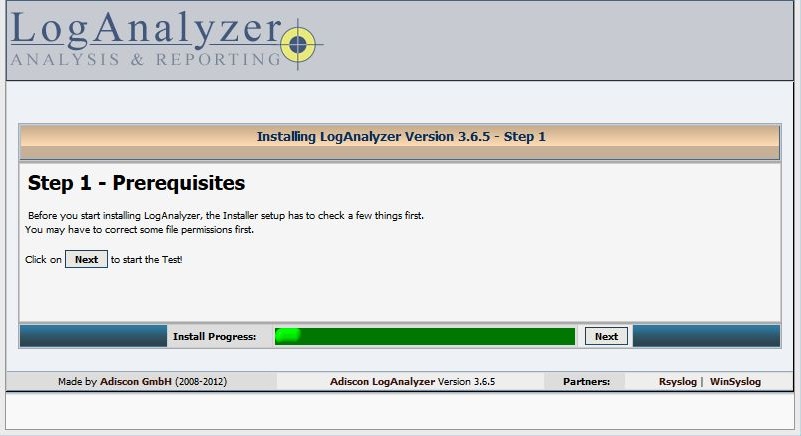
Click Next on first screen
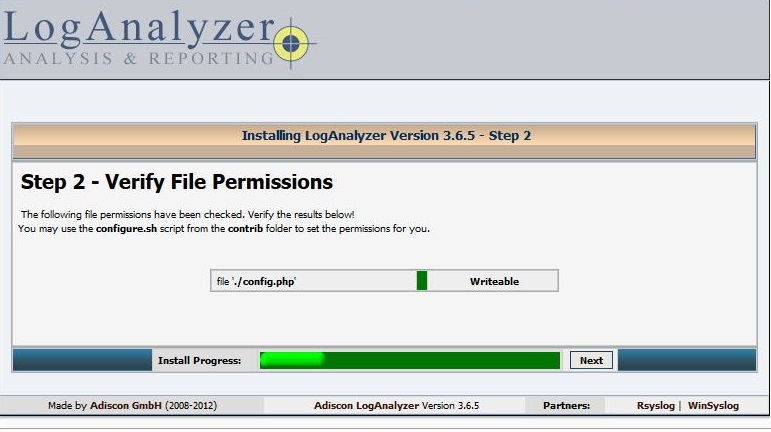
Ensure that your config.php file created in previous step is writable, and click Next to proceed.
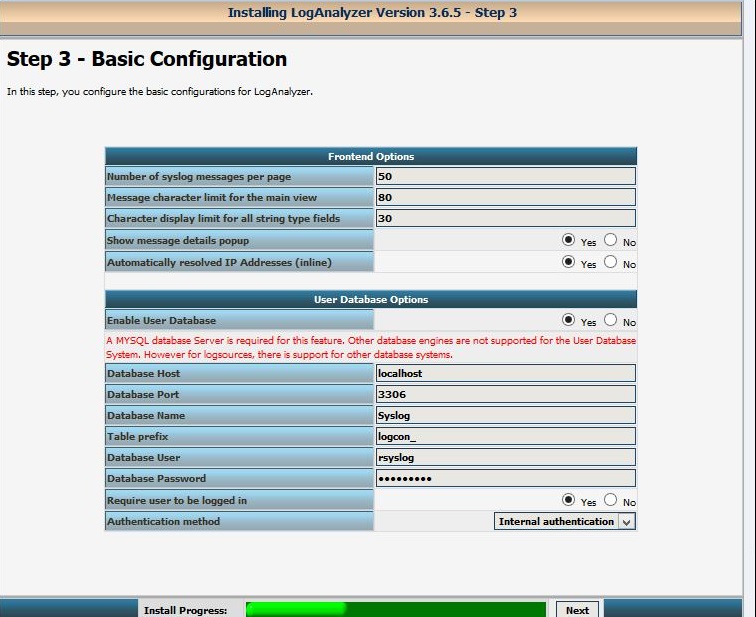
Next, fill database user details that you had used while setting up Rsyslog with MySQL database.
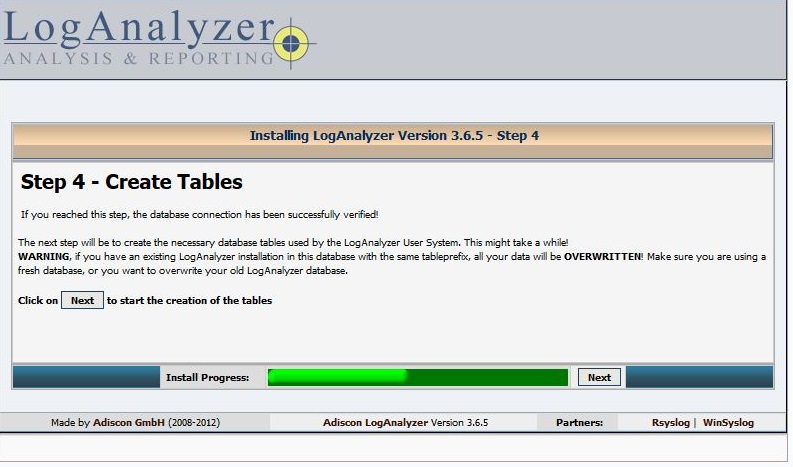
In the next step, the setup wizard will create required database and tables. If they already exist on your system, you may see a warning that those tables will be overwritten.
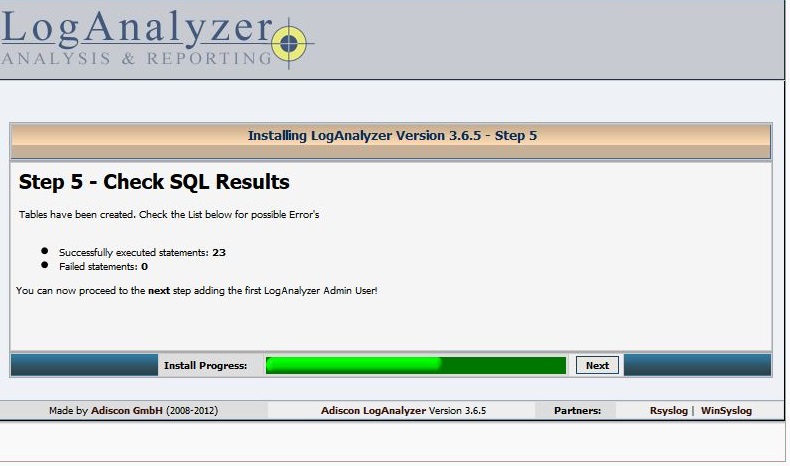
Next screen will show result of table creation.
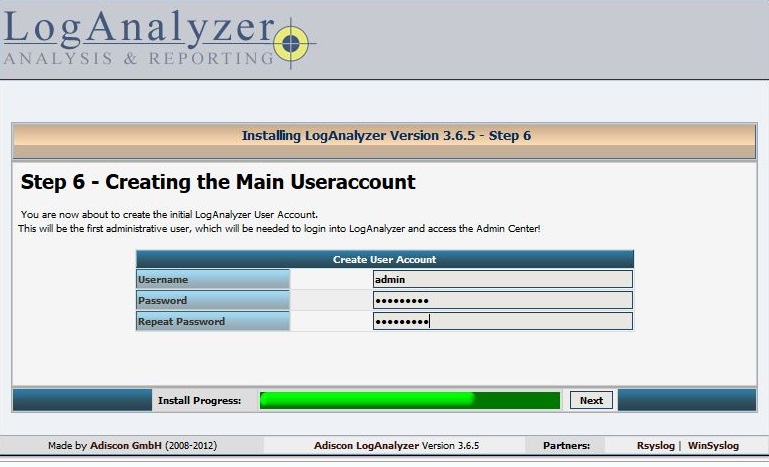
In the next step, create administrator account and click Next.
Next, enter the database details entered while setting up Rsyslog as per our previous article. LogAnalyzer will use these details to get data from your syslog database used to store Rsyslog messages.
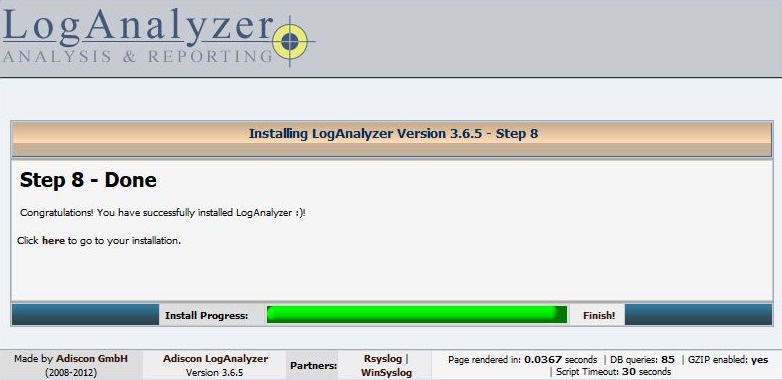
Once installation is complete, click Finish.
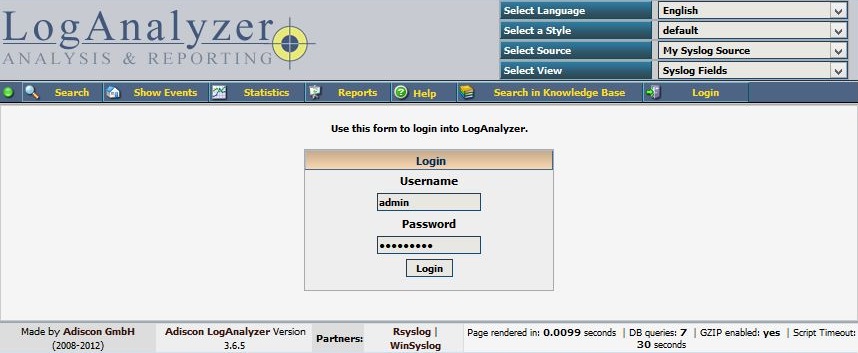
You will see a login screen. Enter login credentials of administrator user to login.
At this point, we have configured Rsyslog to store MySQL database logs ( as per our previous article) and setup LogAnalyzer to provide a web-based interface to view Rsyslog’s data on a web browser, in real-time.
Also read:
How to Setup Rsyslog with MySQL
How to Upload & Download Files From FTP in Linux
How to Delete Files Older Than X Days in Linux
How to Check Inode Usage in Linux
How to Find Inode Number of File in Linux