In this article, we will look at how to install WordPress in NGINX in Ubuntu. WordPress is the most popular content management platform in the world. Typically, it is installed on Apache (LAMP stack). However, if you need to run WordPress behind an NGINX server then you can follow the steps below.
Install WordPress in NGINX in Ubuntu
Here are the steps to install and configure wordpress in NGINX in Ubuntu.
1. Download WordPress
Open terminal and run the following command to download the latest version of WordPress.
$ sudo wget -c http://wordpress.org/latest.tar.gz
Run the following command to unpack the tarball downloaded above.
$ sudo tar -xzvf latest.tar.gz
You will see a wordpress folder created in your present working directory.
Also read : How to Enable IPv6 in Apache
We need to copy this entire folder to /var/www/html
$ sudo cp -R wordpress/ /var/www/html/wordpress
Next, we setup the right permissions and owners so you can install plugins and make updates later on. Please note, www-data needs to be the owner of these folders.
$ sudo chown -R www-data:www-data /var/www/html/wordpress
$ sudo chmod -R 775 /var/www/html/wordpress
That’s it. We have installed WordPress in Ubuntu. Next, we need to create a database for our WordPress website.
Also read : How to Change Root Password in Ubuntu
2. Create wordpress database
WordPress needs a database to store content, images and other stuff for your website.
Open terminal and run the following command to log into MySQL as root.
$ sudo mysql -u root -p
You will be prompted to enter root password.
After you have logged in, run the following commands to create a database, create a database user and grant it the required privileges to update your database. WordPress will connect to your database via this user.
Modify the $database_name, $user and $password below with your database name, database username and password respectively.
mysql> CREATE DATABASE $database_name;
mysql> GRANT ALL PRIVILEGES ON $database_name.* TO '$user'@'localhost' IDENTIFIED BY  '$password';
mysql> FLUSH PRIVILEGES;
mysql> EXIT
Here’s an example where we have used wordpress, wp_user and wp@123 as our database name, username and password respectively.
mysql> CREATE DATABASE wordpress;
mysql> GRANT ALL PRIVILEGES ON wordpress.* TO 'wp_user'@'localhost' IDENTIFIED BY  'wp@123';
mysql> FLUSH PRIVILEGES;
mysql> EXIT
Also read : How to Clone a Git Repository
By default, WordPress provides a sample config file wp-config-sample.php that we need to update to provide your database’s connection details.
We will copy it as wp-config.php and update it. WordPress looks for this file in order to run properly.
$ cd /var/www/html/wordpress
$ sudo mv wp-config-sample.php wp-config.php
Open the file in an editor
$ sudo vi wp-config.php
Update the database connection settings as shown below.
/** The name of the database for WordPress */
 define('DB_NAME', 'wordpress');

 /** MySQL database username */
 define('DB_USER', 'wp_user');

 /** MySQL database password */
 define('DB_PASSWORD', 'wp@123');
Save and exit the file.
Also read: How to Upgrade Django Version
3. Configure NGINX
Create config file wordpress.conf as shown below.
$ sudo vi /etc/nginx/conf.d/wordpress.conf
Copy paste the following lines in the file. Update wordpress and www.example.com with your database and domain names respectively.
server {
        listen 80;
        listen [::]:80;
        root /var/www/html/wordpress;
        index  index.php index.html index.htm;
        server_name mysite.com www.example.com;

        error_log /var/log/nginx/example.com_error.log;
        access_log /var/log/nginx/example.com_access.log;

        client_max_body_size 100M;
        location / {
                try_files $uri $uri/ /index.php?$args;
        }
        location ~ \.php$ {
                include snippets/fastcgi-php.conf;
                fastcgi_pass unix:/run/php/php7.4-fpm.sock;
                fastcgi_param   SCRIPT_FILENAME $document_root$fastcgi_script_name;
        }
}
Make sure the fastcgi_pass value points to the socket PHP-FPM is listening on, as defined by the value of the listen parameter in the /etc/php/7.4/fpm/pool.d/www.conf pool configuration file. The default value is a UNIX socket /run/php/php7.4-fpm.sock.
Check NGINX configuration and restart it.
$ sudo nginx -t
$ sudo systemctl restart nginx
Also read : How to Upgrade Python in Ubuntu
4. Complete WordPress setup online
Open your web browser and enter your domain example.com. You will see the following screen for WordPress setup.
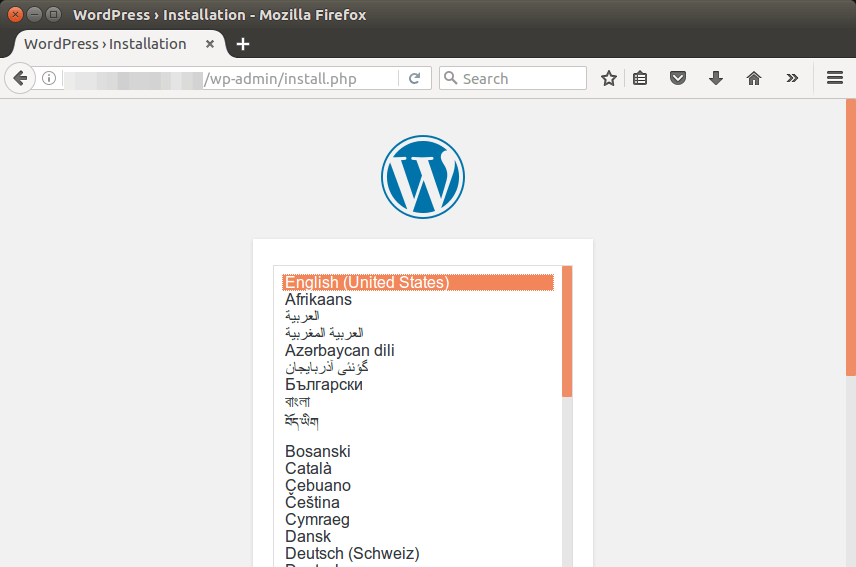
Select language of your choice and click Continue
You will see the following screen. Enter the required details about your website such as site name, admin username, password & email. Click Install.
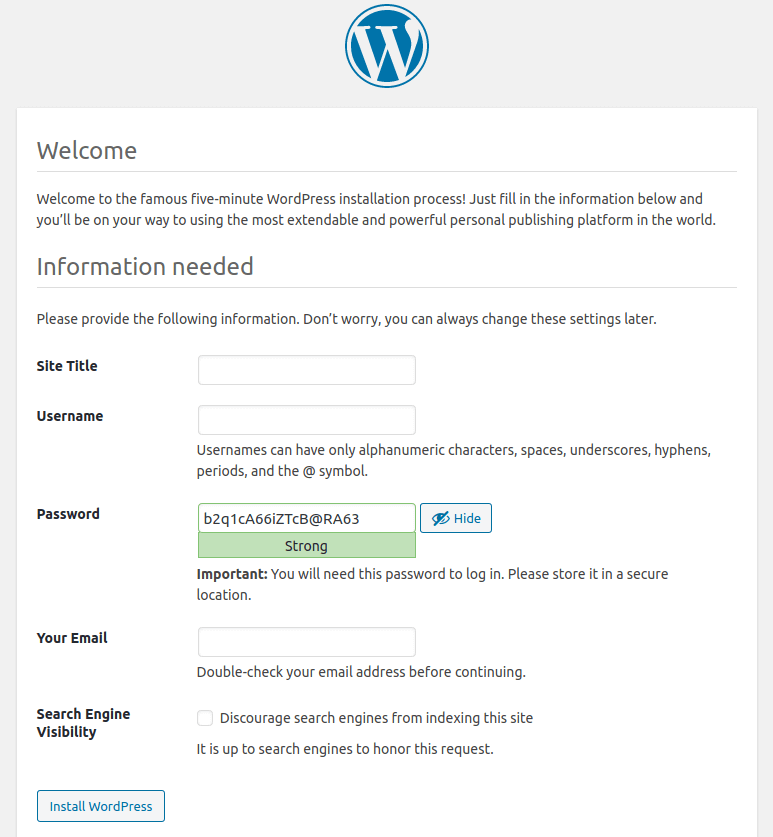
That’s it. WordPress will complete the setup in a few seconds and you will be redirected to your website’s home page.