RabbitMQ is a popular message broker that allows different applications and services to communicate with each other using message queues. In this article, we will look at how to install RabbitMQ in Ubuntu.
What is RabbitMQ?
In many industries such as finance, applications and services need to communicate with each other asynchronously. So they use a messaging queue where the sender application adds data and which the receiving application keeps polling regularly to fetch messages. Message brokers like RabbitMQ make it easy to manage multiple queues to help multiple applications & services communicate with each other.
Also read : How to Change User Password in Linux
How to Install RabbitMQ in Ubuntu
Here are the steps to install RabbitMQ in Ubuntu.
1. Update Ubuntu
Open terminal and run the following commands to update Ubuntu libraries.
$ sudo apt-get update
$ sudo apt-get -y upgrade
Also read : How to Install Fail2ban in Ubuntu
2. Enable RabbitMQ repository
Run the following command to enable RabbitMQ repository.
$ sudo echo "deb http://www.rabbitmq.com/debian/ testing main" >> /etc/apt/sources.list
Also read : How to Find Top CPU consuming processes in Linux
3. Add verification key for RabbitMQ
The following command will add the verification key for RabbitMQ.
$ sudo curl http://www.rabbitmq.com/rabbitmq-signing-key-public.asc | sudo apt-key add -
It will take a few minutes to run the above command, depending on your net speed.
Also read : How to Open Port in Linux
4. Update Ubuntu
Update Ubuntu libraries once again
$ sudo apt-get update
Also read : How to Install pip in Ubuntu
5. Install RabbitMQ Server
Run the following command to install RabbitMQ Server.
$ sudo apt-get install rabbitmq-server
Also read : How to Change Root Password in Linux
6. Enable Rabbit Management Console
Rabbit Management Console helps you manage RabbitMQ server, users & message queues effectively. Here is the command to enable it.
$ sudo rabbitmq-plugins enable rabbitmq_management
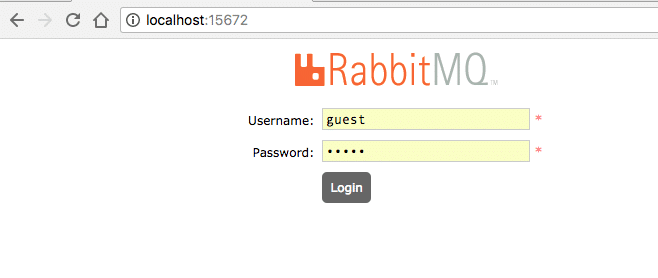
Once it is enabled, you can access it via the following URL
http://localhost:15672/
When you visit the above URL, you will see an authentication screen. The default username & password are guest & guest respectively.
Once you have logged in successfully, you will see RabbitMQ dashboard.

You can use this dashboard to manage the different elements of RabbitMQ Server.
Also read : How to Clone a Git Repository in Ubuntu
7. Manage RabbitMQ
Here are a few handy commands to help you easily manage RabbitMQ server.
#To start the service:
$ service rabbitmq-server start

#To stop the service:
$ service rabbitmq-server stop

#To restart the service:
$ service rabbitmq-server restart

#To check the status:
$ service rabbitmq-server status
RabbitMQ is an enterprise-grade message broker which is pre-configured and well-packaged. Its default configuration is good enough for production environments also.