PgAdmin is an open source database management tool that allows you to easily manage PostrgeSQL databases using a graphical interface. It is useful for users who do not want to type PostgreSQL commands for every operation. It provides plenty of useful features such as query highlighting, saving & replay of queries, and more. In this article, we will look at how to install PgAdmin 4 in Ubuntu.
How to Install PgAdmin 4 in Ubuntu
Here are the steps to install PgAdmin 4 in Ubuntu. Please note, you need a root user or user with sudo privileges to install PgAdmin in Ubuntu.
1. Update Packages
Open terminal and run the following commands to update Linux packages.
$ sudo apt-get update
Also read : How to Install Jenkins in Redhat Linux
2. Install Required Packages
You need to install python, pip and virtualenv before installing PgAdmin. In most Ubuntu systems, python & pip are already present by default. Yet, we have included them below for the sake of completeness.
$ sudo apt-get install build-essential libssl-dev libffi-dev libgmp3-dev
virtualenv python-pip libpq-dev python-dev
If you see any prompts, enter Y to proceed.
Also read : How to Add Conditional Headers in NGINX
3. Create Virtual Environment
We will create a separate virtual environment for PgAdmin so that it remains isolated from installation or modification of other applications on your system. For this purpose, we will make a new folder and create a virtual environment within this folder.
$ mkdir pgAdmin4
$ cd pgAdmin4
$ virtualenv pgAdmin4
We will also activate our virtual environment with the following command.
$ cd pgAdmin4
$ source bin/activate
Also read : How to Install Apache Cassandra in Ubuntu
4. Download & Install pgAdmin 4
Run the following command to download PgAdmin 4
$ sudo wget https://ftp.postgresql.org/pub/pgadmin/pgadmin4/v2.1/pip/pgadmin4-
2.1-py2.py3-none-any.whl
Install PgAdmin 4 with the following command.
$ pip install pgadmin4-2.1-py2.py3-none-any.whl
Also read : How to Create Empty File in Linux
5. Configure PgAdmin 4
After installation, we need to create a configuration file at /python2.7/site-packages/pgadmin4/. We will create a config file at this location.
$ sudo vi /python2.7/site-packages/pgadmin4/config_local.py
Add the following content in this configuration file.
import os
DATA_DIR = os.path.realpath(os.path.expanduser(u'~/.pgadmin/'))
LOG_FILE = os.path.join(DATA_DIR, 'pgadmin4.log')
SQLITE_PATH = os.path.join(DATA_DIR, 'pgadmin4.db')
SESSION_DB_PATH = os.path.join(DATA_DIR, 'sessions')
STORAGE_DIR = os.path.join(DATA_DIR, 'storage')
SERVER_MODE = False
Use the following command to run PgAdmin
$ python lib/python2.7/site-packages/pgadmin4/pgAdmin4.py
If you get any error message related to flask-htmlmin module, then run the following command to install the module before running PgAdmin.
$ pip install flask-htmlmin
$ python lib/python2.7/site-packages/pgadmin4/pgAdmin4.py
Also read : How to Install Sublime Text in Ubuntu
6. Test PgAdmin 4
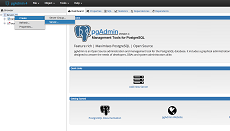
PgAdmin runs on port 5050. Open browser and go to http://localhost:5050. You will see the following PgAdmin 4 dashboard.
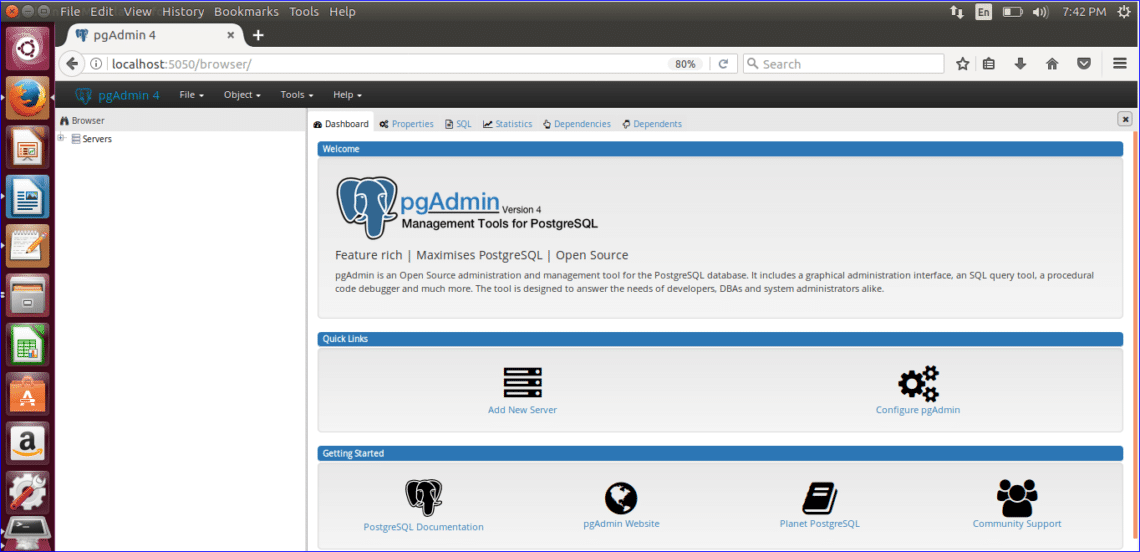
That’s it. You are ready to use PgAdmin 4. Just click Add New Server to connect your PostgreSQL database to PgAdmin. You will see a connection form that you can fill out and click Save to create a new database connection.
Also read : How to Add/Remove User in Ubuntu