Ghost is a popular open source blogging platform that provides many useful features. It is free, lightweight and runs on NodeJS platform. It is specifically built for blogging and so it has many blogging-specific features such as markdown editor, scheduled publishing, themes, etc. In this article, we will look at how to install ghost blog platform with NGINX server on Ubuntu.
How to Install Ghost Blog with NGINX in Ubuntu
Here are the steps to install Ghost blogging platform on Ubuntu.
1. Update system & install dependencies
Open terminal and run the following commands to update Ubuntu system and install project dependencies.
$ sudo apt-get update -y
$ sudo apt-get install gnupg2 curl unzip git acl -y
2. Install NodeJS
Run the following command to install NodeJS & NPM package manager on your system.
$ sudo curl -sL https://deb.nodesource.com/setup_12.x | bash -
$ sudo apt-get install nodejs -y
3. Install NGINX & MariaDB
Next, we install NGINX & MariaDB. You may also use MySQL instead.
$ apt-get install mariadb-server nginx -y
Secure MariaDB installation with following command.
$ mysql_secure_installation
You will see the following prompt asking you to enter details about different types of login to be allowed/disallowed.
Enter current password for root (enter for none):
Set root password? [Y/n] Y
New password:
Re-enter new password:
Remove anonymous users? [Y/n] Y
Disallow root login remotely? [Y/n] Y
Remove test database and access to it? [Y/n] Y
Reload privilege tables now? [Y/n] Y
Now your MariaDB database will be installed and secured properly.
4. Setup MariaDB database
We will need to create a database, user & password for Ghost platform. Run the following commands to log into your MariaDB database.
$ sudo mysql -u root -p
Run the following commands to create database and user. Replace ghostuser and password below with username & password of your choice.
MariaDB> CREATE DATABASE ghostdb;
MariaDB> CREATE USER 'ghostuser'@'localhost' IDENTIFIED BY 'password';
Next, grant all privileges to ghostuser.
MariaDB> GRANT ALL ON ghostdb.* TO 'ghostuser'@'localhost';
Finally, flush privileges to apply changes.
MariaDB> FLUSH PRIVILEGES;
MariaDB> EXIT;
5. Install Ghost Blog CLI
Next, we install Ghost command line interface to manage ghost blog.
$ sudo npm install -g ghost-cli@latest
Verify installation with the following command
$ ghost version
Ghost-CLI version: 1.17.3
6. Configure Ghost
We will create a separate Ubuntu user (user1) for Ghost.
$ sudo adduser user1
We will also give this new user sudo privileges and add it to group www-data, used by NGINX web server to access/modify files for Ghost.
$ adduser user1 sudo
$ adduser user1 www-data
Next, log out of Ubuntu and log in as user1. Create directory for Ghost with the following command. This is where we will download files related to Ghost blogging platform, just as we do with WordPress.
$ su - user1
$ sudo mkdir /var/www/ghost
Run the following commands to set the right file permissions and ownership.
$ sudo chown -R www-data:www-data /var/www/ghost
$ sudo chown -R www-data:www-data /var/www/
$ sudo chmod 775 /var/www/ghost
$ sudo setfacl -R -m u:user1:rwx /var/www/ghost/
Change directory to /var/www/ghost and begin installation.
$ cd /var/www/ghost
$ sudo ghost install
You will see the following prompt, asking you to enter details about your blog. You will be asked to enter database name, user name, password. Enter the details for database user created in step 4 above. Also you will be asked if you want to configure ghost with NGINX. Enter Yes. Now it will automatically create temporary folders and create some users for its internal requirement.
? Enter your blog URL: http://ghost.example.com
? Enter your MySQL hostname: localhost
? Enter your MySQL username: ghostuser
? Enter your MySQL password: [hidden]
? Enter your Ghost database name: ghostdb
? Configuring Ghost
? Setting up instance
+ sudo useradd --system --user-group ghost
+ sudo chown -R ghost:ghost /var/www/ghost/content
? Setting up "ghost" system user
? Setting up "ghost" mysql user [skipped]
? Do you wish to set up Nginx? Yes
+ sudo mv /tmp/ghost-example-com/ghost.example.com.conf /etc/nginx/sites-available/ghost.example.com.conf
+ sudo ln -sf /etc/nginx/sites-available/ghost.example.com.conf /etc/nginx/sites-enabled/ghost.example.com.conf
+ sudo nginx -s reload
? Setting up SSL [skipped]
? Do you wish to set up Systemd? Yes
+ sudo mv /tmp/ghost-example-com/ghost_ghost-example-com.service /lib/systemd/system/ghost_ghost-example-com.service
+ sudo systemctl daemon-reload
? Setting up Systemd
+ sudo systemctl is-active ghost_ghost-example-com
? Do you want to start Ghost? (Y/n) Y
Finally, it will have installed Ghost as well as configured it to work with your NGINX server.
7. Open Ghost Admin Interface
Open browser and visit your blog’s admin URL http://ghost.example.com/ghost. The admin URL is obtained by adding /ghost to your blog URL entered in above step.
You will see the following screen.
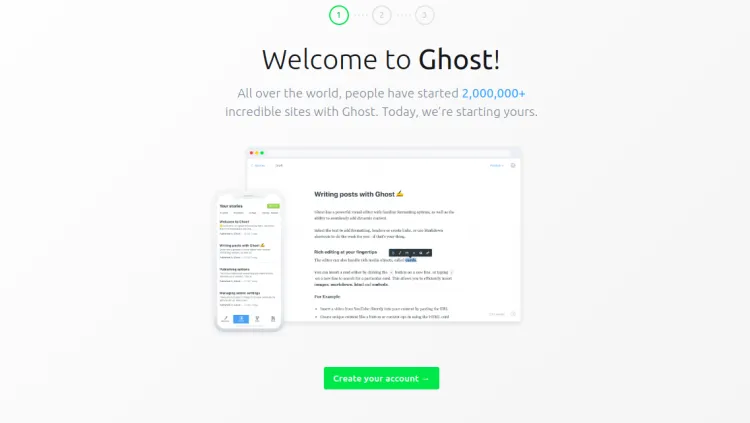
Click Create Account button to create new Ghost account. Provide user details and click “I’ll do this later” at nottom of the screen. You will be taken to the admin dashboard.

If you visit your blog’s URL http://ghost.example.com you will see the default home page

That’s it. You have successfully installed Ghost blogging platform with NGINX in Ubuntu.
Also read:
How to Save Grep Output to File in Linux
How to Force File Download in PHP
How to Force File Download in NGINX
How to List All Users in Ubuntu
Apache Configure Multiple Virtual Hosts