Single User mode, also known as Maintenance mode is an operating mode in Linux systems, whereby only a minimal set of applications and drivers are loaded at the time of system boot, allowing only a single user, that is, the superuser to perform debugging or run critical tasks. It is mainly used for system maintenance or emergency repairs, as it does not allow you to connect to any network. For example, it can be used to run fsck to repair damaged disk partitions, reset root password, fix failed to mount /etc/fstab error. It is most commonly used when your system does boot normally. It is similar to starting system in Safe Mode in Windows systems. In this article, we will learn how to boot into single user mode in CentOS.
How to Boot Into Single User Mode in CentOS
Here are the steps to boot into single user mode in CentOS.
First, reboot your CentOS machine. Once boot starts wait for GRUB menu to appear as shown in the screen below.
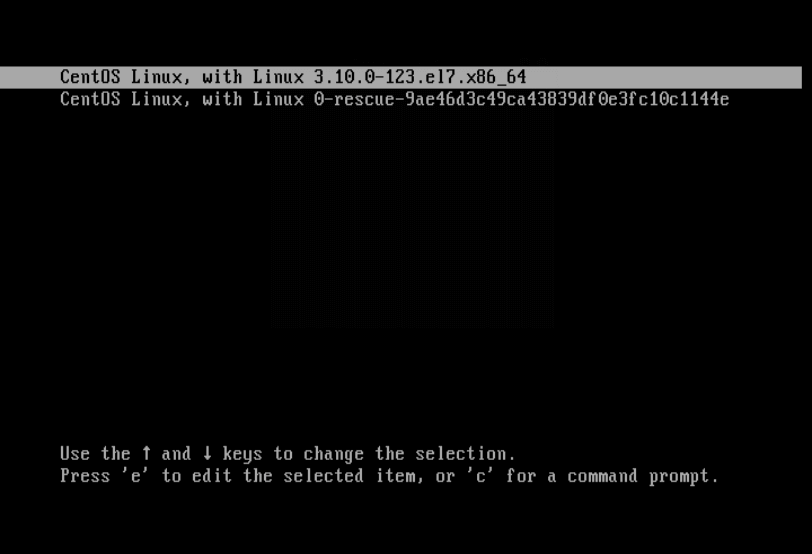
Select kernel version using arrow keys and press ‘e’ key to edit first boot option. You will see the following screen. Use down arrow key to go to the line starting with ‘linux16’. Change the argument ‘ro’ to ‘rw init=/sysroot/bin/sh’ as shown below.

Next, press Ctrl-X or F10 to boot into single user.
Now mount root (/) filesystem using the following command.
# chroot /sysroot/
You will be logged into a terminal where you perform all required maintenance tasks. You may not have access to all drivers and may not be able to run all applications, though. Once you are done, reboot the system.
# reboot -f
Please note, the single user mode or maintenance mode is not password protected by default. You will need to separately password protect it. Here are the steps to generate GRUB password.
Also read:
How to Restore Delete Tmp Directory in Linux
How to Change Linux Partition Label Names
How to Disable Output Buffering in Python
How to Read Large Files in Python
How to Copy File Permissions & Ownership in Linux